Hello! This month, the Imagine Artists in Residence are featuring the color Evergreen. I decided to create an evergreen wreath with Delicata Inks, and I am going to show you how.
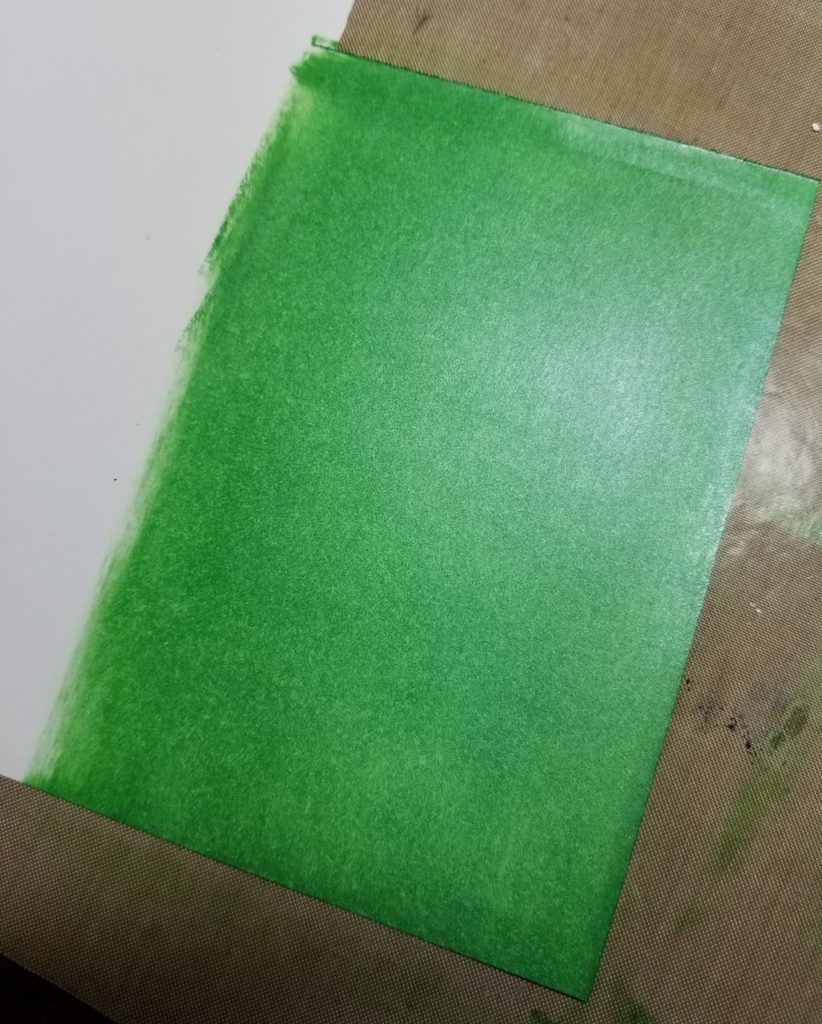
I started off with a piece of Mixed Media White Paper and covered it with Emerald Green Delicata ink. You can see the pretty shimmer this ink has. Although this is a pigment ink, it does dry quickly. But if you’re a little impatient, you can use a heat tool to speed up the process.
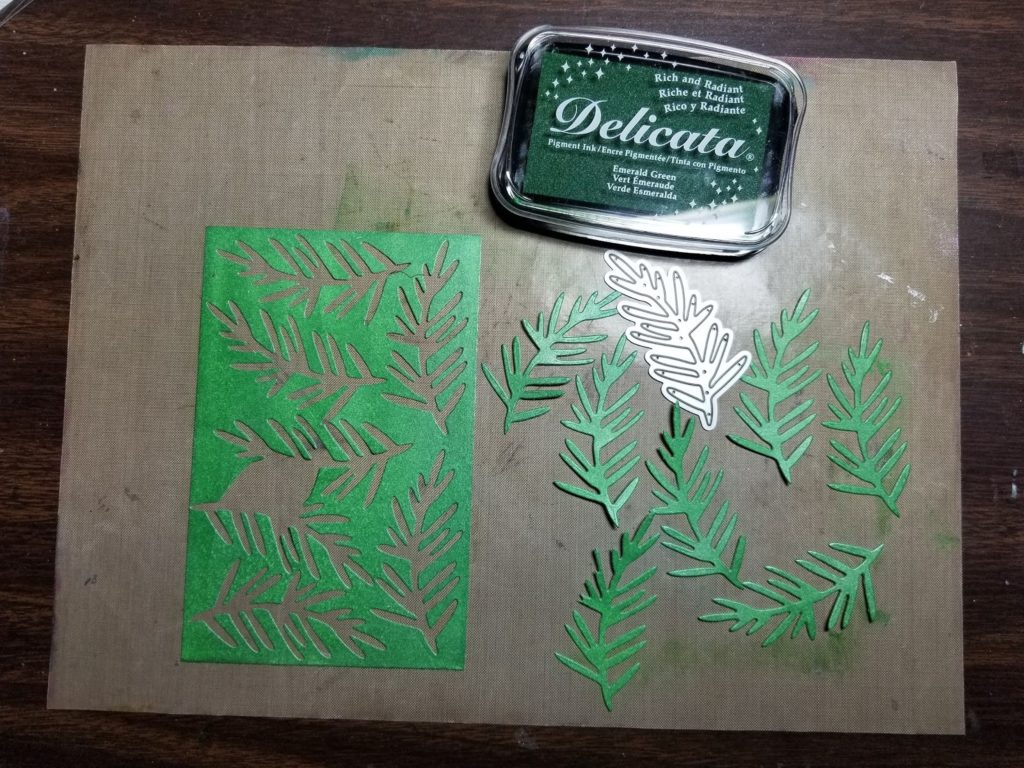
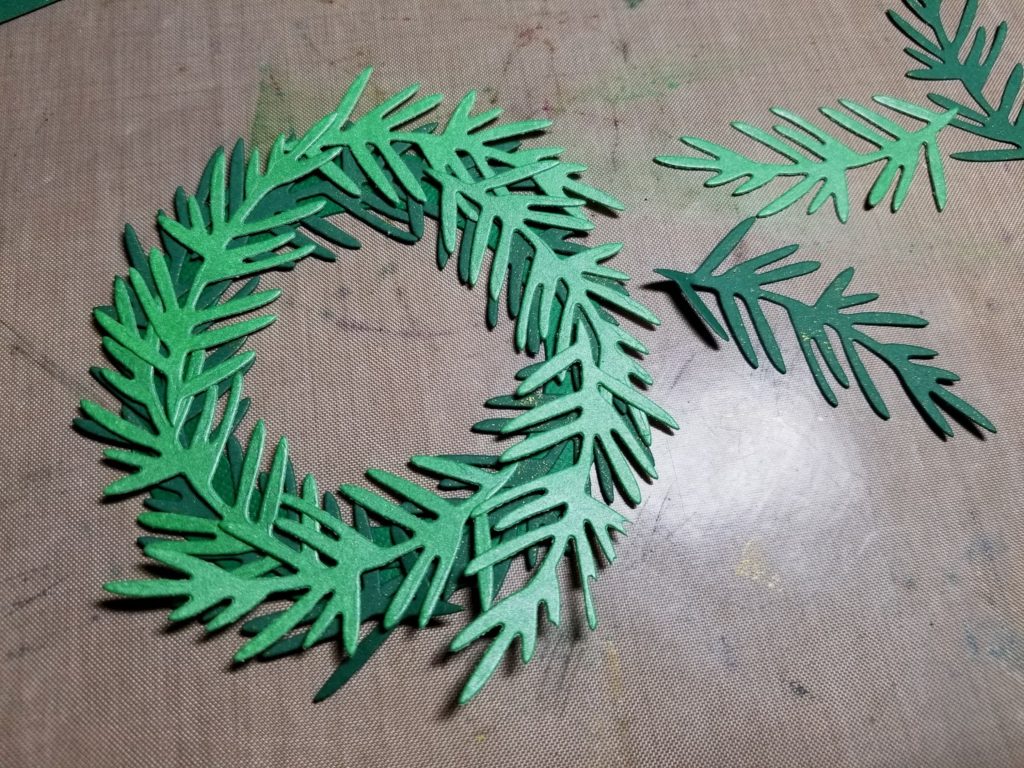
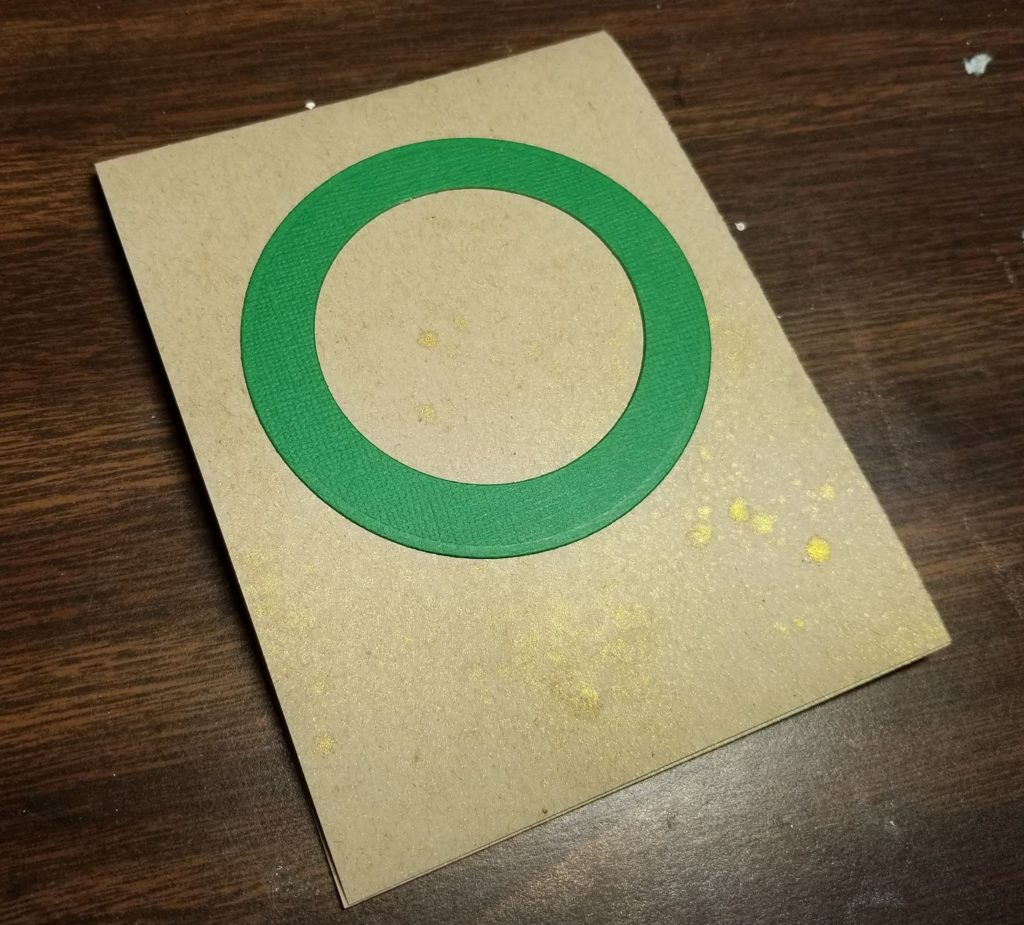
Using the Build A Wreath die set from Stampendous!, I die cut several evergreen boughs from the inked paper. I also die cut the largest circle from the set with a precolored piece of green cardstock.
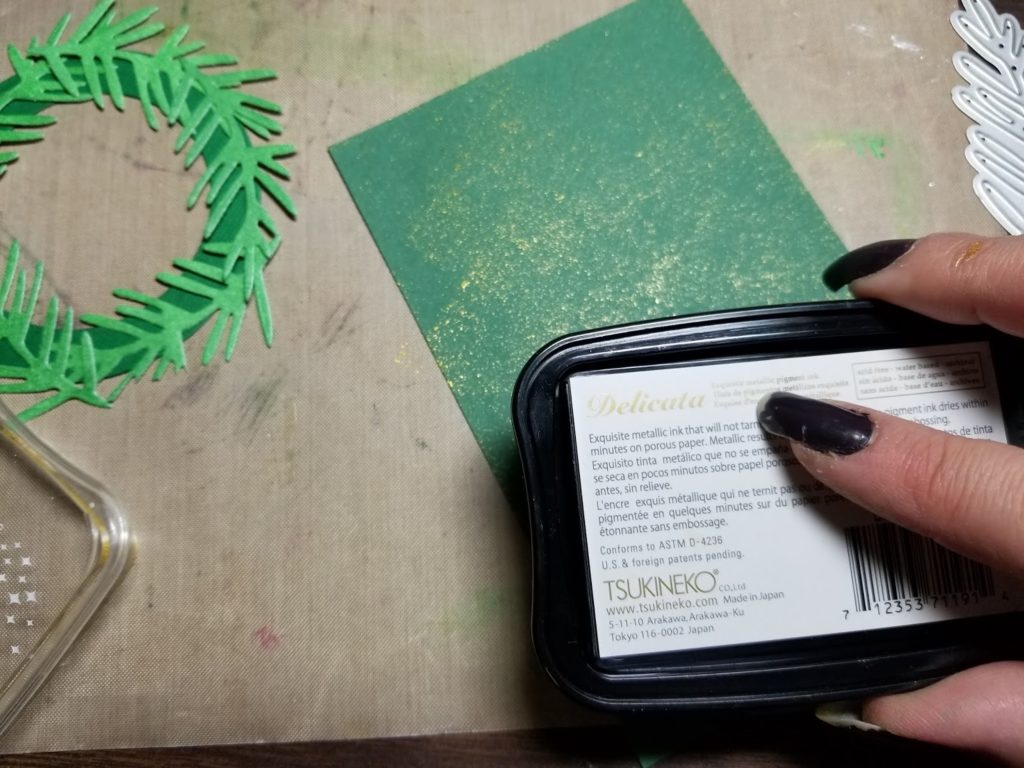
Using a deep shade of green colored cardstock, I tapped the surface with Golden Glitz Delicata ink to give it some sparkle and depth. I then die cut the evergreen boughs out of this color too.
I was satisfied with how these two layers looked, but it definitely needed some embellishing.
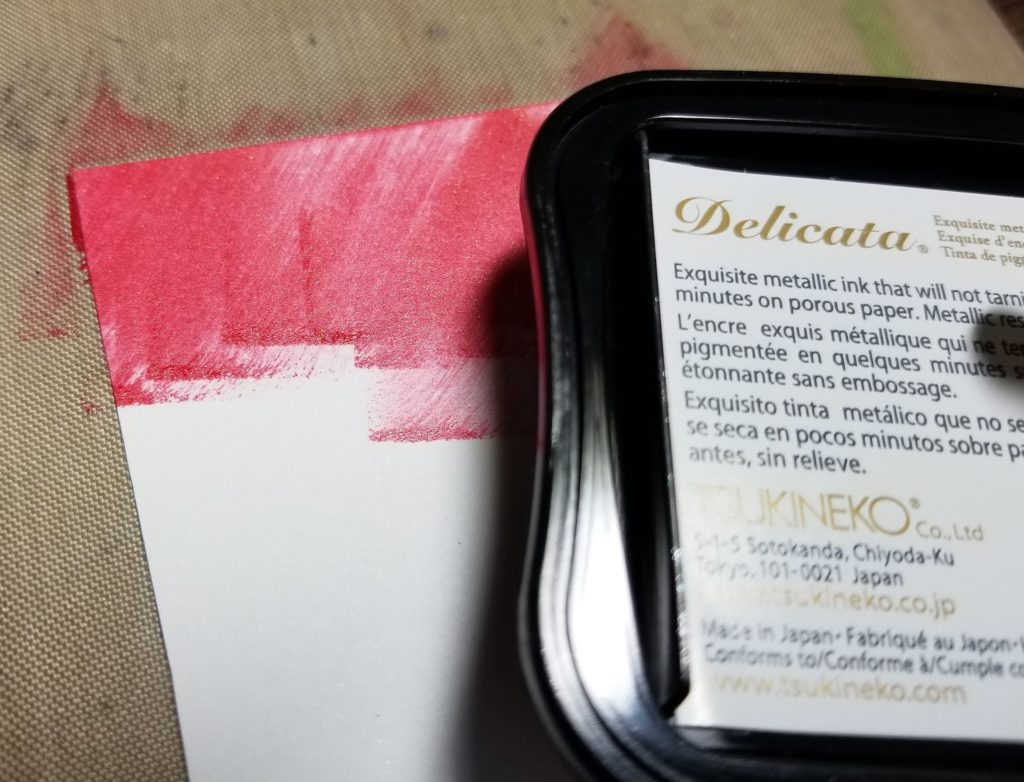
There is a trio of berries in the die set, so I colored another piece of Mixed Media White Paper with Ruby Red Delicata. Then I die cut the berries.
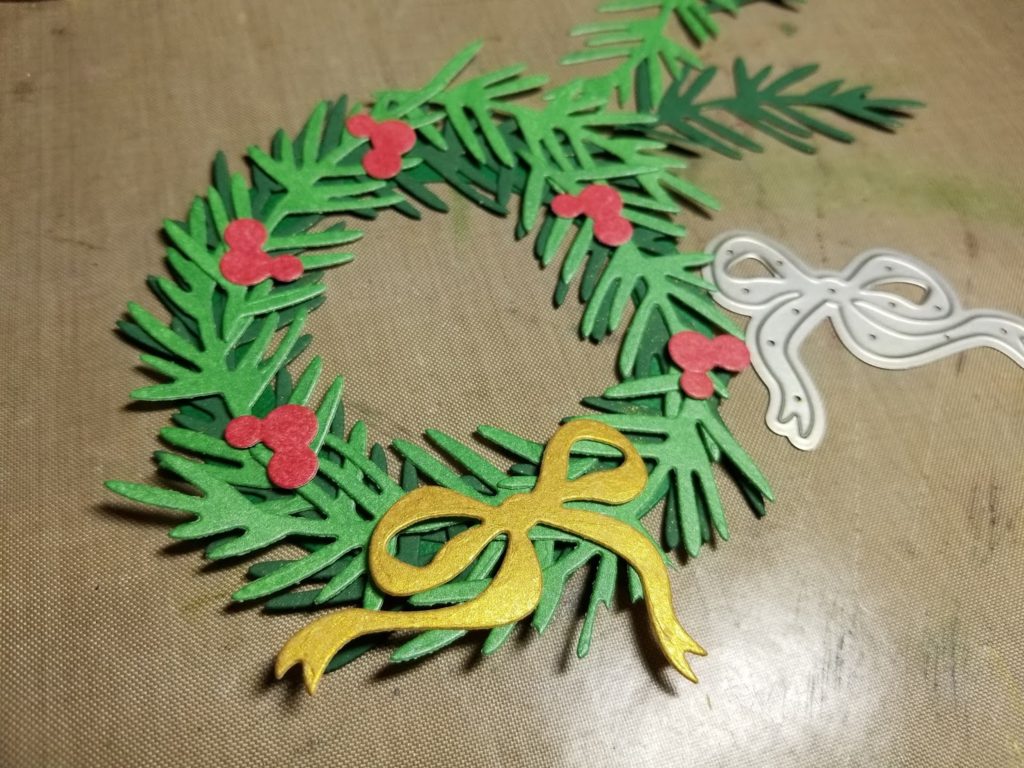
The berries looked good, but I love bows on wreaths. So I repeated the ink to paper process again with Golden Glitz Delicata and cut the pretty bow.
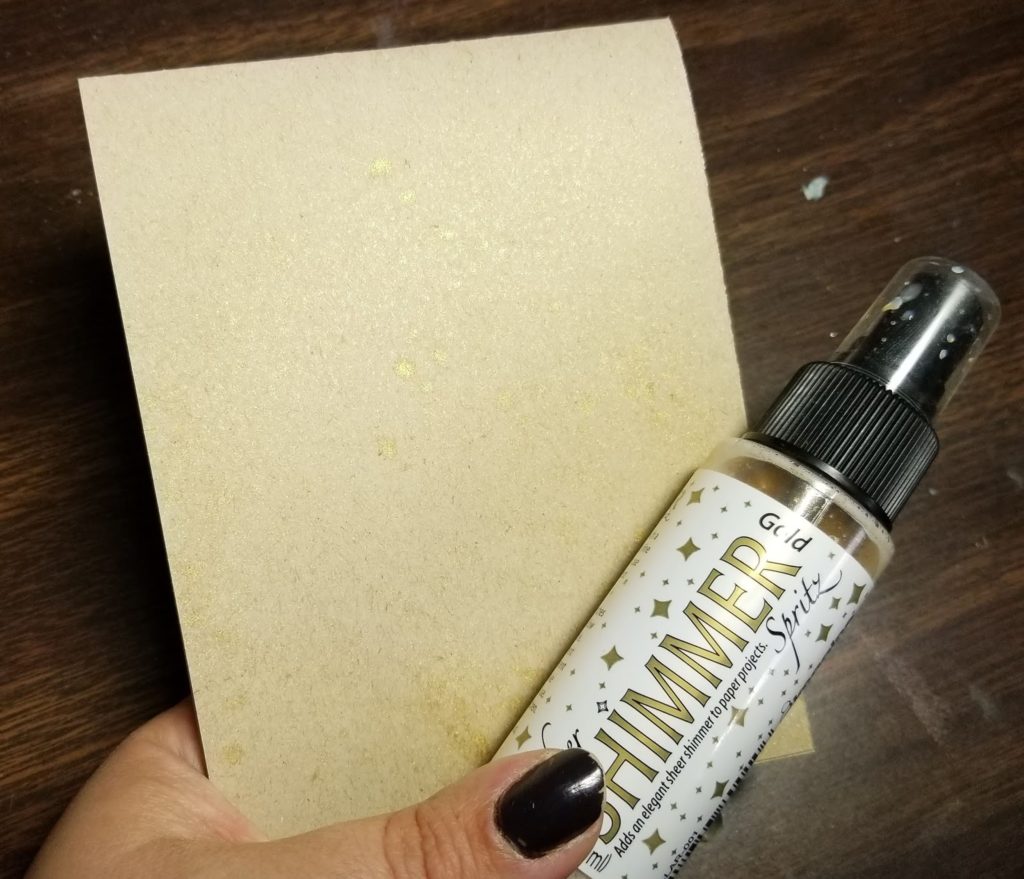
Now it’s time to move on to the card base. I used Neenah Desert Storm for my base, cut to 4 1/4″ x 11.” Then I sprayed it with Sheer Shimmer Spritz in Gold. This gold works perfectly with the Golden Glitz Delicata.
Now it’s time to assemble the wreath. I glued down the wreath base first.
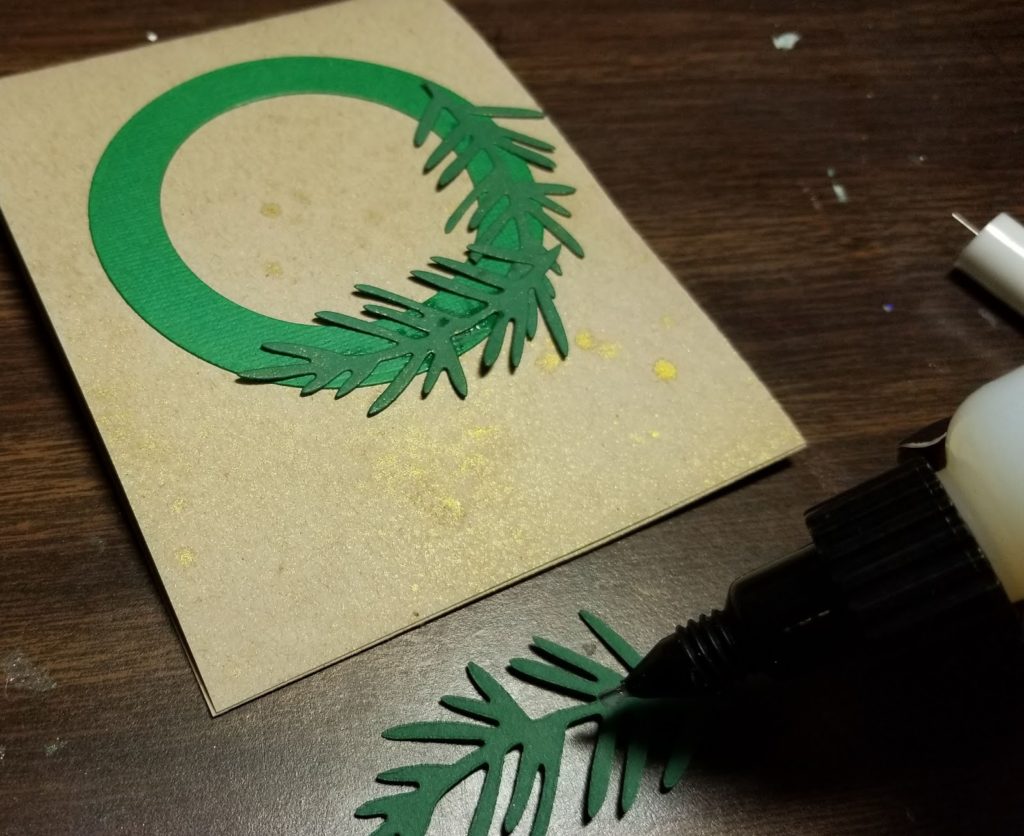
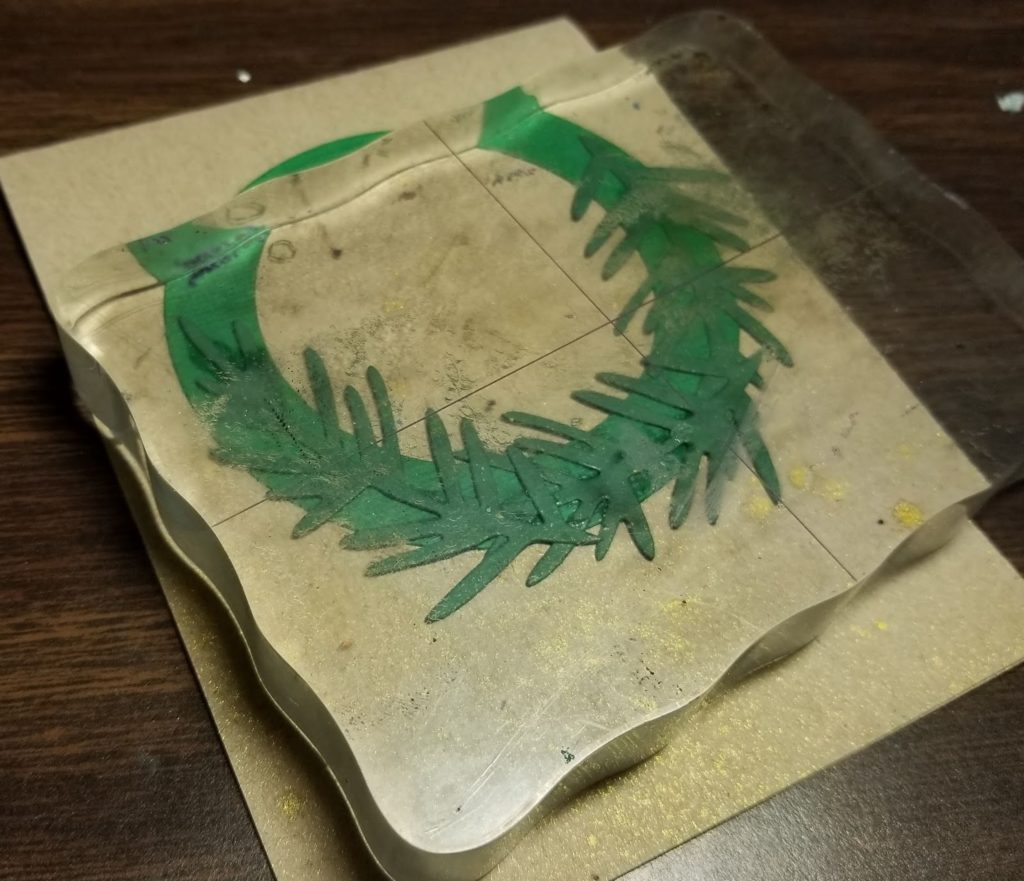
I used On Point Glue for all of the assembly. This adhesive is perfect for these small, detailed pieces. I started with the darker, precolored green cardstock pieces. As I glued each piece down, I placed a heavy acrylic block on top to weigh the pieces down as the glue dried.
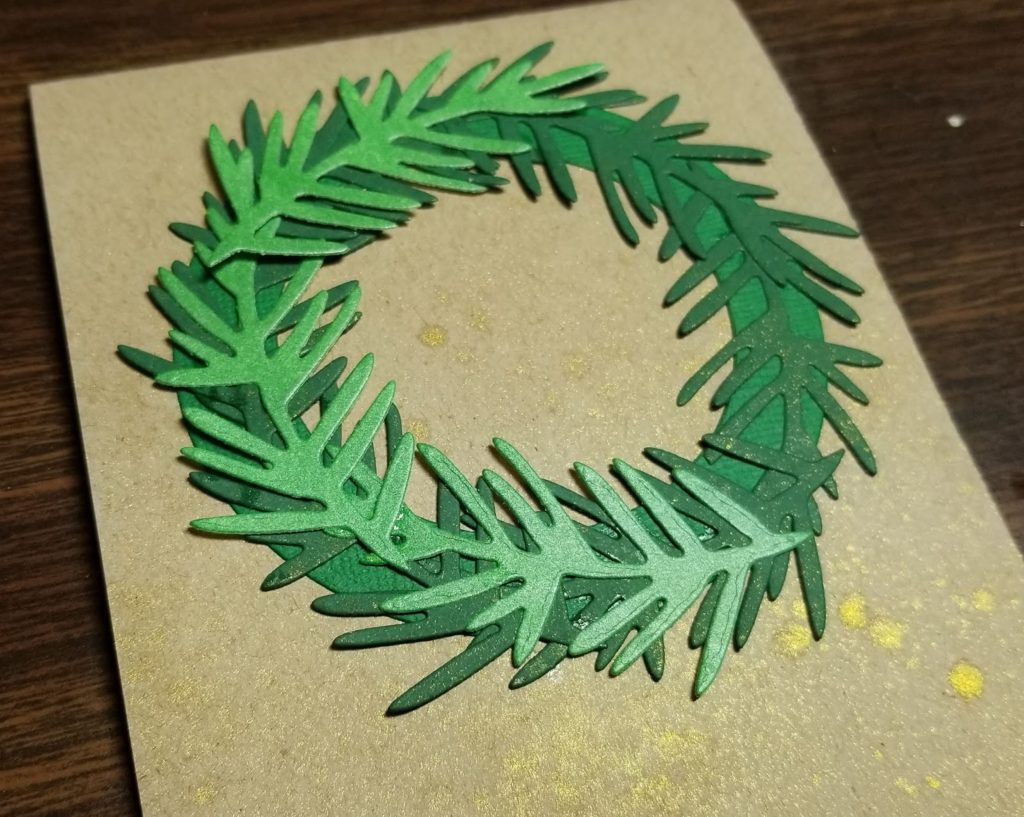
Next I moved on to the Emerald Green colored pieces, and repeated the same process with the glue and the block. Then I added the berries and the bow.
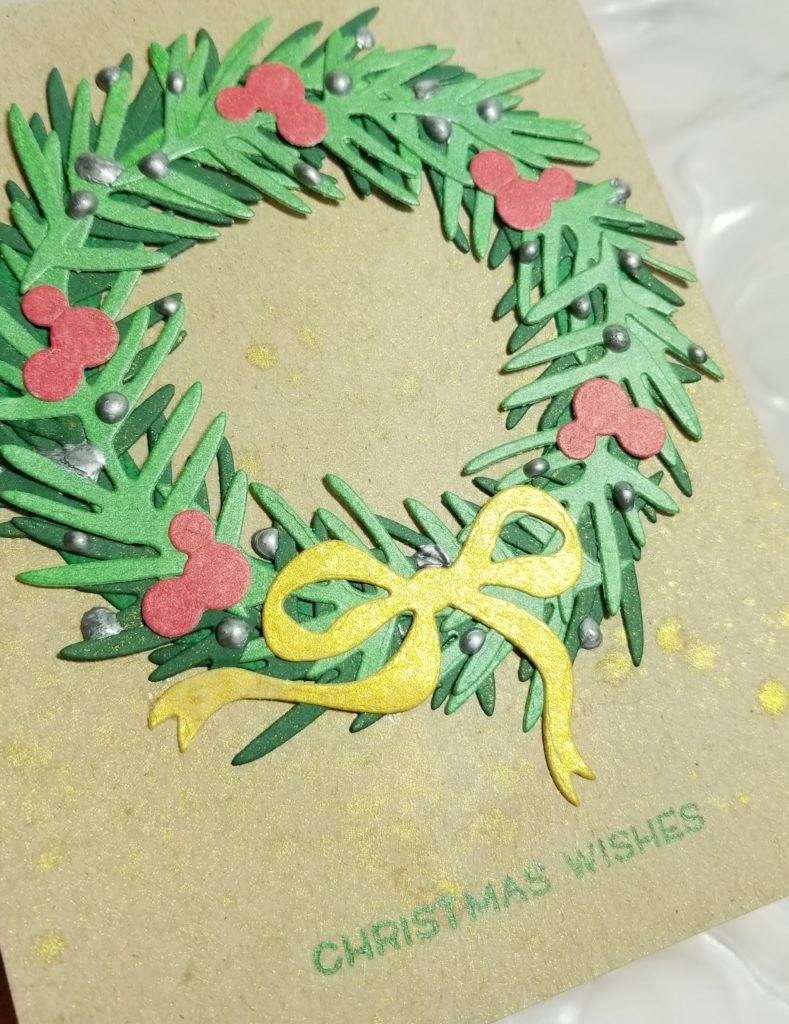
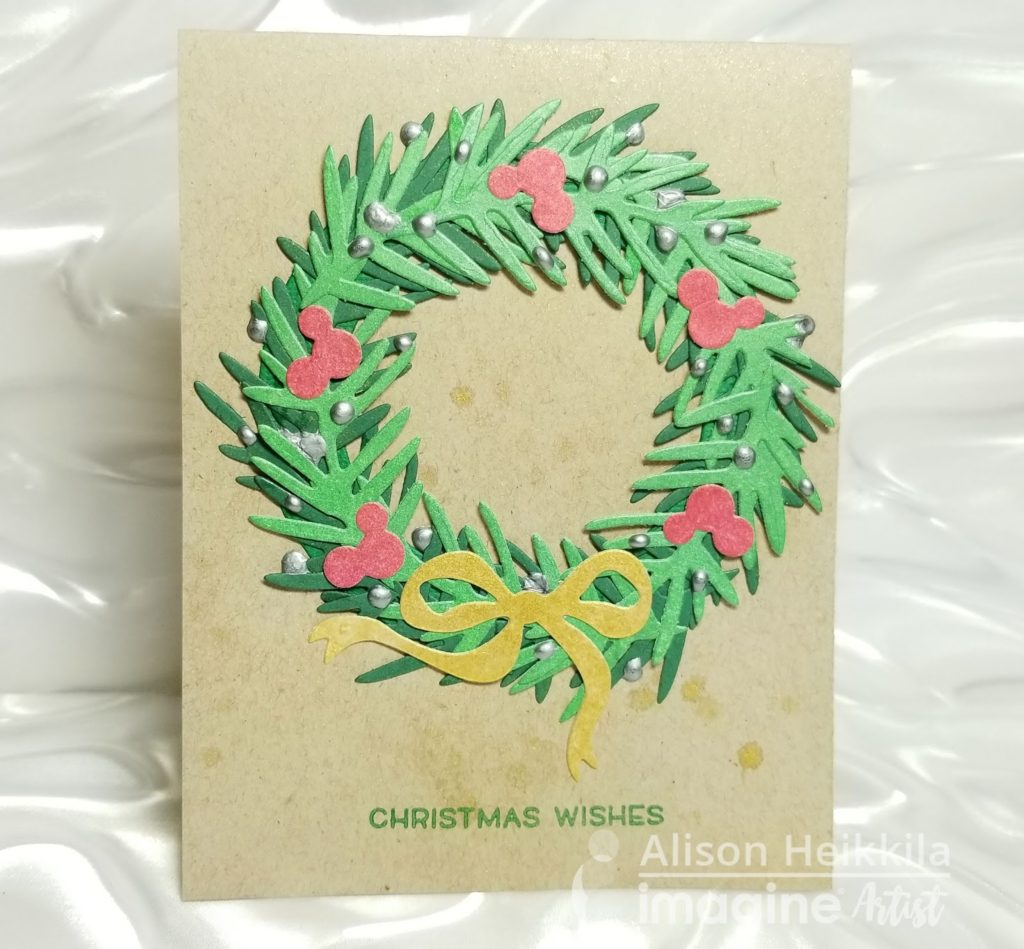
I completed the card with a simple “Christmas Wishes” sentiment from Lawn Fawn stamped in Emerald Green and by adding “ornaments” with Silver irRESISTable Pico Embellisher. I love the additional texture the ornaments added.
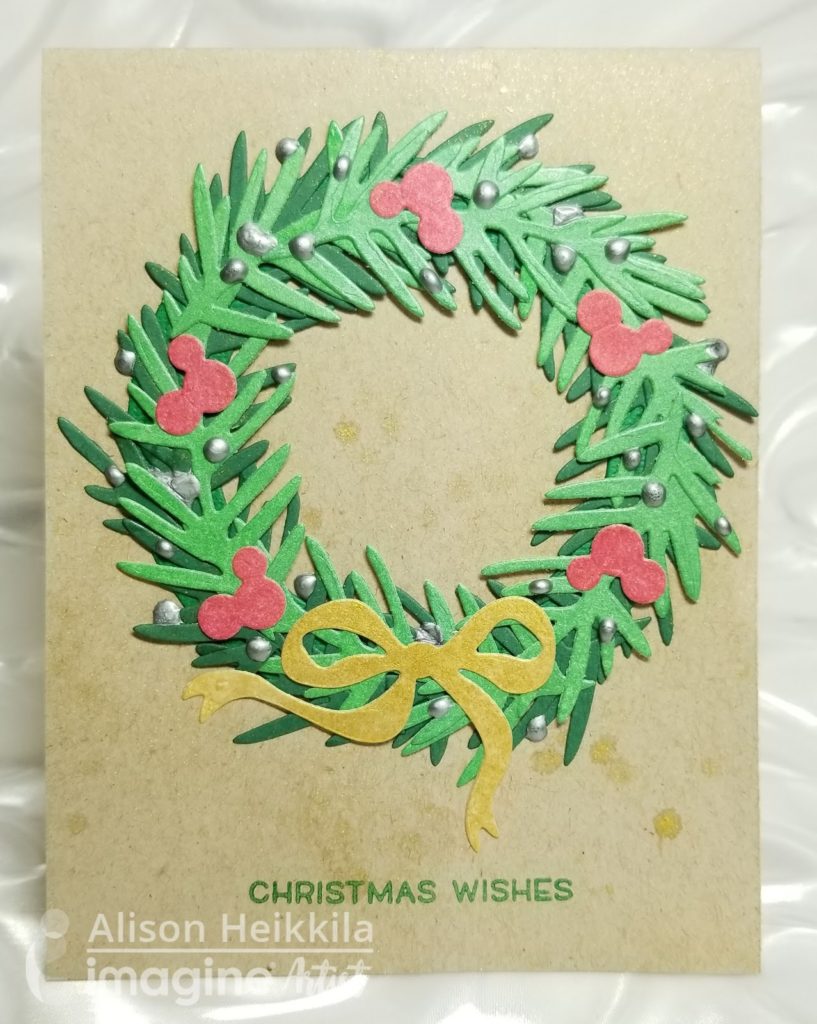
And here’s the completed card. It’s fun to create your own colored paper using inks. I hope you’ll give it a try! Thanks for stopping by. Have an inspiring day!
Supplies:
Imagine:
Delicata Ink in Emerald Green, Ruby Red, Golden Glitz
Sheer Shimmer Spritz in Gold
irRESISTable Pico Embellisher in Silver
On Point Glue
Other:
Stampendous: Build a Wreath Die Set, Mixed Media White Paper
Neenah Desert Storm cardstock
Lawn Fawn: Sprinkled with Joy Clear Stamps
Skill Level: Beginner
Time to Complete: 30-45 minutes, plus drying time.
Thank you so much for your kind words!