Fireworks!
are fun to spritz, but there are other things you can do with them. My project
today will give you some examples.
Directions:

1. I started
off with 2 coordinating stencils- a background, patterned stencil, and a
singular large image stencil. In this case, it was a heart. I taped down my
watercolor paper(only on top, to create a hinge), then the background stencil,
and then my heart stencil.
off with 2 coordinating stencils- a background, patterned stencil, and a
singular large image stencil. In this case, it was a heart. I taped down my
watercolor paper(only on top, to create a hinge), then the background stencil,
and then my heart stencil.

2. Grab your
Fireworks spray and let’s get spritizing! But wait! Don’t spray your stencils.
This time, we are going to spray our Craft Mat and use sponge daubers to apply
the color. Make sure you shake up your Fireworks! before you spray them on to your craft mat.
Fireworks spray and let’s get spritizing! But wait! Don’t spray your stencils.
This time, we are going to spray our Craft Mat and use sponge daubers to apply
the color. Make sure you shake up your Fireworks! before you spray them on to your craft mat.


3.
Using your sponge daubers, start to apply the colors to the watercolor paper. Fireworks!
dry quickly, so you will want to work fast, but you can always go back and
apply more to blend the colors better. I had my tape set up as a hinge so that
I can peek underneath the stencils to see if I was happy with the coverage. The
result is a pretty, shimmery blended rainbow.

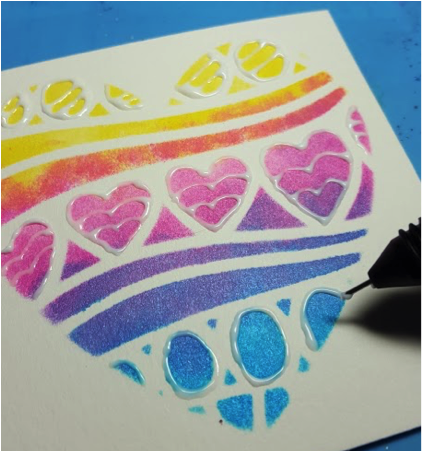
4. Next, I
added some definition and extra designs to the completed heart by using
irRESISTables Pico Embellisher in Wedding Dress. I outlined a lot of the areas,
but I also doodled a bit. I let the irRESISTables dry, and then I cut out the
heart.
added some definition and extra designs to the completed heart by using
irRESISTables Pico Embellisher in Wedding Dress. I outlined a lot of the areas,
but I also doodled a bit. I let the irRESISTables dry, and then I cut out the
heart.

5. I took my
card base and spritzed the same 3 colors of Fireworks! on to it, spraying from
the center out. Those large splotches in the center won’t show. I let this dry.
card base and spritzed the same 3 colors of Fireworks! on to it, spraying from
the center out. Those large splotches in the center won’t show. I let this dry.

6. I cut out
a large circle of pink cardstock, and I unscrewed the cap of the Bahama Blue
Fireworks! You can see in the photo above that I touched the bottom of the
“straw” of the nozzle to the circle, and then I dragged it down. I redipped the
straw into the liquid fairly frequently and put lots of these shimmery,
semi-random lines all over the top of the circle.

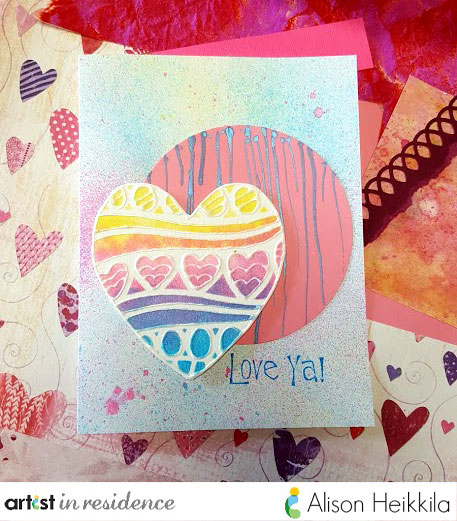
7. I then
glued the circle to the card base, and then attached the heart using adhesive
foam for some dimension. I stamped a fun sentiment using Bahama Blue Memento
ink, and then voila! I was done! So that’s 3 fun ways to use Fireworks!
glued the circle to the card base, and then attached the heart using adhesive
foam for some dimension. I stamped a fun sentiment using Bahama Blue Memento
ink, and then voila! I was done! So that’s 3 fun ways to use Fireworks!
Supplies:
Imagine
- Fireworks! Spray – Dandelion, Bahama Blue, Rose Bud
- irRESISTables Pico Embellisher – Wedding Dress
- Memento Ink – Bahama Blue
- Sponge Daubers
Other
- Stampendous – Heart Stencil Duo set
- Inkadinkado – Sentiment Stamp
- Artist’s Loft – Watercolor Paper
- Cardstock and card base


A really gorgeous card and what a fantastic technique! Stencil layering is new to me but is something I now have to try. Am wondering what Dreamweaver stencils I own that I can try this with. Thanks for sharing Karen x