Hello! I bet many of you have die sets that you love, and you wish you could use them on everyday, household items. I’ve got great news for you! If you’ve got Artesprix‘s Sublimation Stamp Ink, some craft foam, and a fun Blank, like the Potholder I’m using today, you totally can! Here’s a step-by-step tutorial, showing you exactly how simple and fun it can be.
*Some affiliate links are used in this post. That means that if you shop through these links, I may receive a small compensation, at no cost to you. For more information, please see my Affiliates page, where I also have some coupon codes.
What is Iron-On Ink?
Artesprix Sublimation Markers, Ink, and Paint are specially formulated to allow you to use basic copy paper to: color, stamp, stencil, and monoprint anything you wish and turn it into a heat-transferable design. These designs are then applied to a polyester or polyester coated substrate with heat and pressure. You can use a heat press or a home iron! These designs, through this process of sublimation, will become permanent on your substrates.
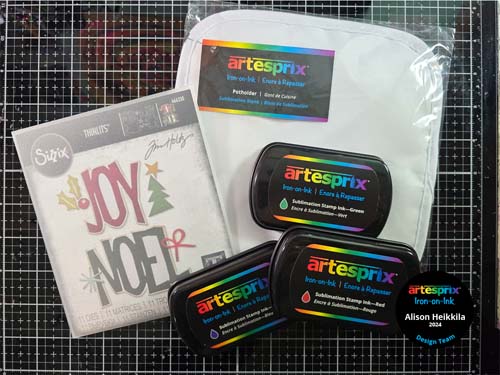
Supplies:
Artesprix:
Potholder
Sublimation Stamp Ink in Red, Green, and Yellow
Acrylic Stamping Block
Protective Paper
Heat Tape
Other:
Sizzix & Tim Holtz: Big Tidings Dies
Craft Foam
Adhesive Tape
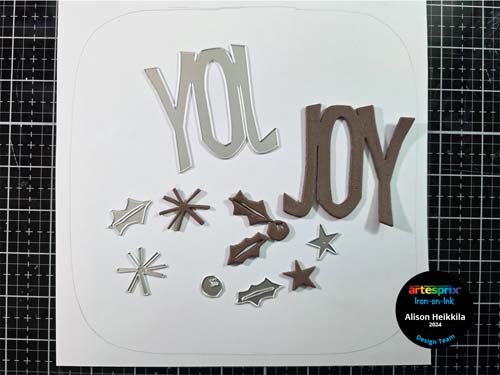
Step 1: Trace the Potholder onto a piece of copy paper with a pencil.
Step 2: Die cut the pieces you plan on using out of craft foam.
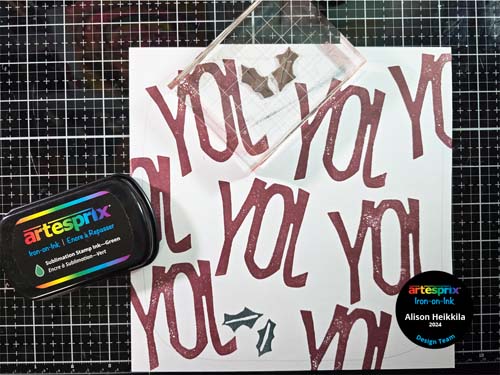
Step 3: Use an adhesive (like a tape runner) to attach the “Joy” to the Acrylic Stamping Block. Be sure to adhere it so that the “Joy” looks correct from the bottom. This way, it will stamp backwards and will sublimate correctly later. Stamp all over the paper with the Red Sublimation Stamp Ink.
Step 4: Adhere the Holly Leaves to the Block. Stamp with Green Sublimation Stamp Ink. Be sure to leave room for the berry!
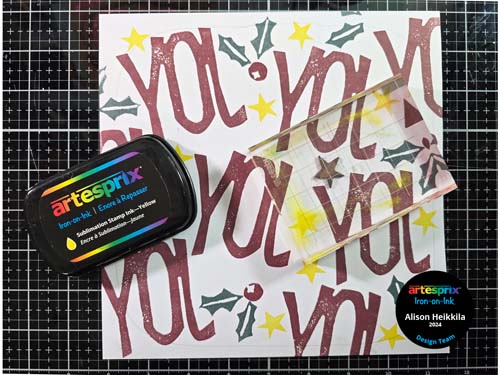
Step 5: Adhere the Berry to the Block and stamp near the Holly Leaves with the Red Sublimation Stamp Ink.
Step 6: Adhere the star to the Block and stamp all over with the Yellow Sublimation Stamp Ink.

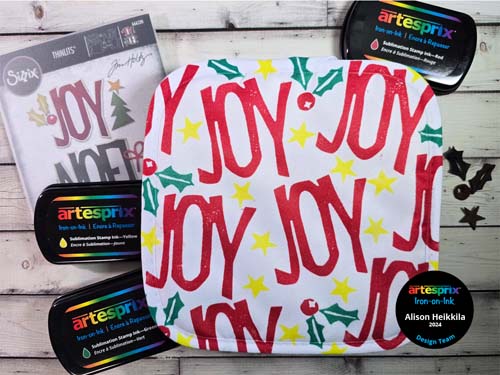
Here is what our finished design looks like. It’s so whimsical and festive!
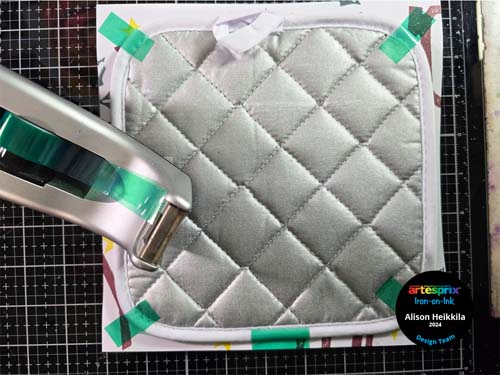
Step 7: Attach the Potholder face down onto the design with Heat Tape.
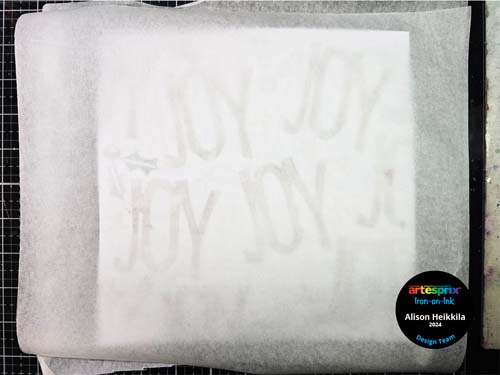
Step 8: It’s time to make the Sublimation Sandwich. This sandwich not only ensures a great transfer of your design, but it will protect your heat source as well. Your sandwich will be: Protective Paper – Design (face down) – Potholder – Protective Paper.
Step 9: Sublimate the Potholder at 400 degrees for 60 seconds.
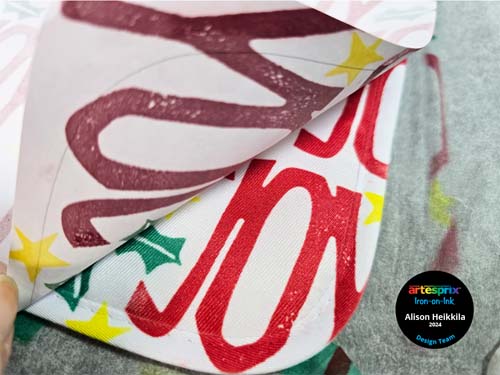
Step 10: Let’s do the Peek Test! Lift up a corner of the design from the sublimated Blank to be sure our design transferred successfully. If it didn’t, replace the design onto the Blank and re-sublimate. Mine looks great, so I can finish pulling the paper away from the Potholder.
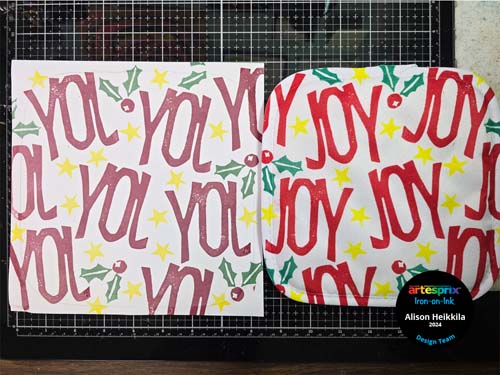
Here is our finished potholder next to the original design. The colors are so vibrant and bold, now that we have sublimated them. It came out so cute!

My new custom Potholder is going to look fabulous on our holiday table. I love being able to turn dies into stamps. Using craft foam with Artesprix’s Sublimation Stamp Ink always gives such wonderful results! How would you like to get more ideas on using Artesprix’s Sublimation Ink Pads, Markers, and Paint? There’s a Facebook Group that’s just for fans of Artesprix! You can click HERE to join. Also, don’t forget to visit the Artesprix store to see all of the available blanks and bundles, so you can get started with sublimation. You can use my code, ALISON10 to save 10% on your purchase! Thanks so much for stopping by. Have an inspiring day!
Thank you so much for your kind words!