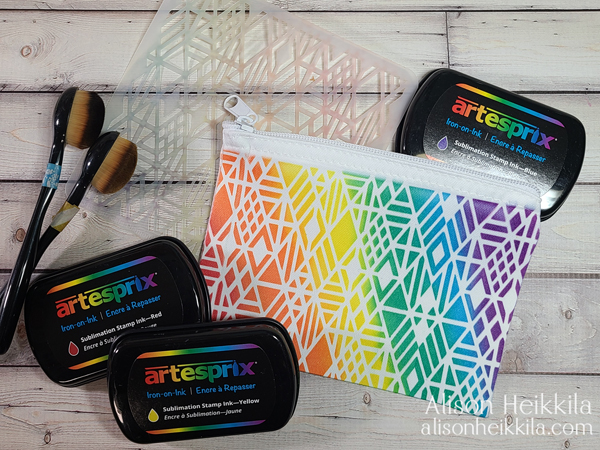
Hello! Today, I decided to combine two of my favorite companies to make 1 cool project. I fell in love with the Intricate Diamonds stencil from A Colorful Life Designs because the pattern is so unique. I knew it would look amazing on a Zip Case from Artesprix. I’m only doing a partial tutorial in this post, but I’ll explain it enough so that you can easily make this on your own. If you want to see more complete tutorials, you can search “Artesprix” in my sidebar.
*Some affiliate links are used in this post. That means that if you shop through these links, I may receive a small compensation, at no cost to you. For more information, please see my Affiliates page, where I also have some coupon codes.
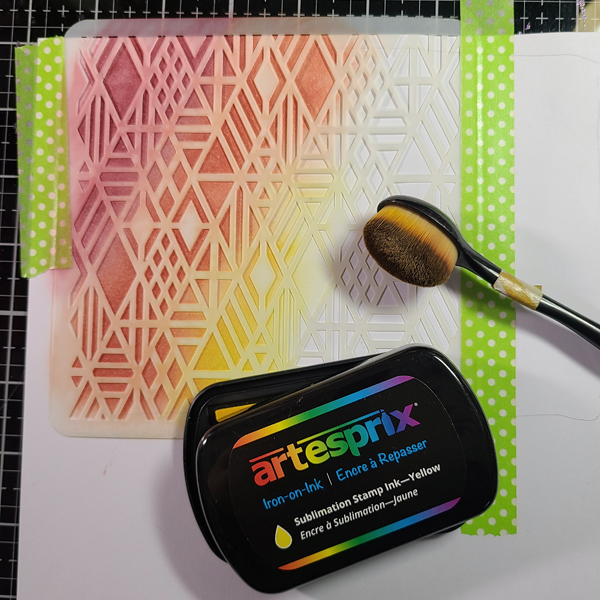
You’ll start by tracing the Zip Case on to a piece of copy paper. Then you’ll tape down the stencil and start ink blending with Artepsrix’s Sublimation Ink Pads. You should go past your pencil line, in case you don’t perfectly realign your Zip Case when you go to sublimate it. I went for rainbow order with my ink blending. Please note, the colors will not be very vibrant until after the sublimation process.
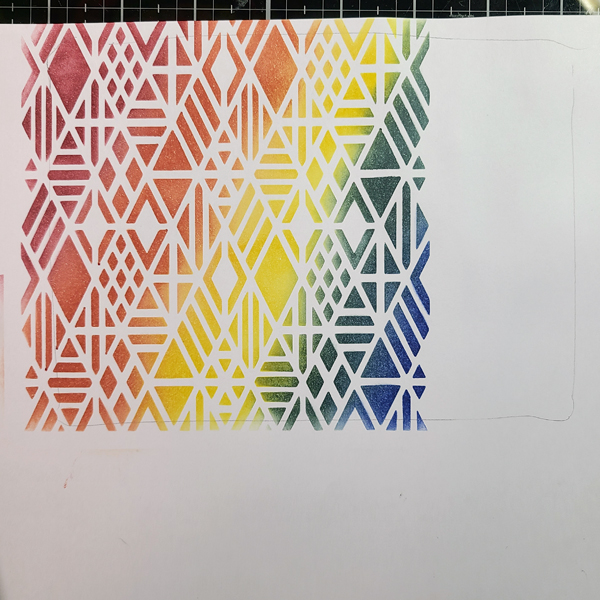
The Intricate Diamonds stencil is a 6×6, but as you’ll see, the Zip Case is larger. This stencil, is easy to realign to make a continuous pattern as large as you want.
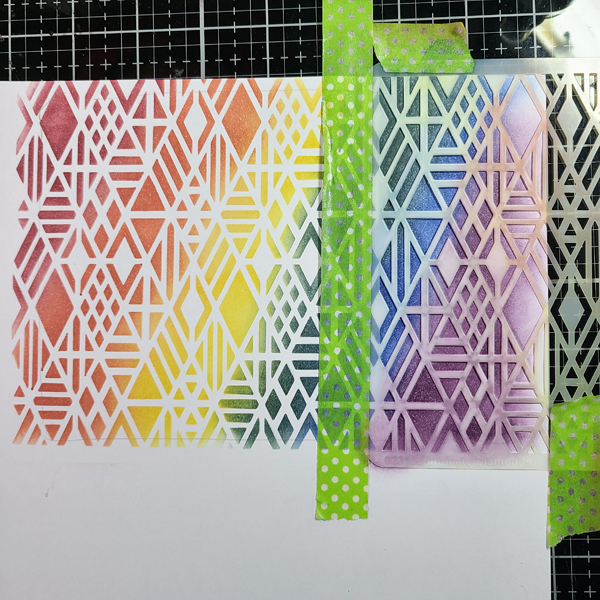
Overlap the stencil a bit so that you have a seamless pattern. Then you can continue ink blending. I recommend using ink blending tools that you use only for Artesprix inks, so as to not contaminate your other ink pads with this special sublimation ink.
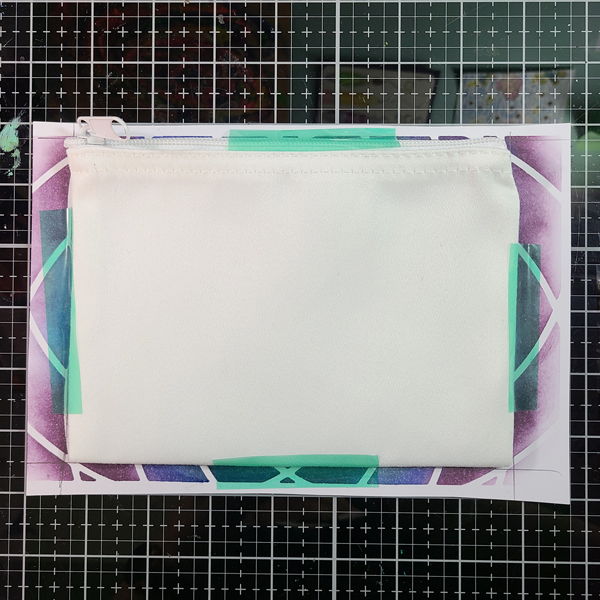
When your ink blending is done, you will lay the Zip Case on top of the stenciled area and tape it down with Heat Tape. This is the only type of tape you can use for this process. Once it is taped down well, you can flip the project over so that the back side of the inked design is facing up.
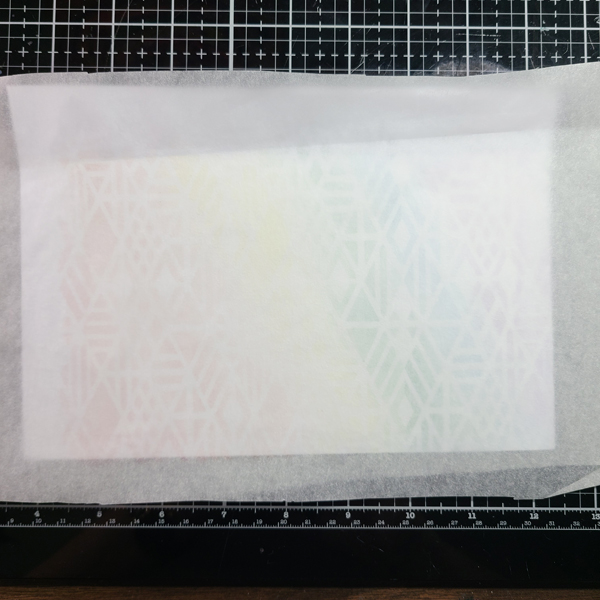
Now we’re going to finish the Sublimation Sandwich. You’ll put a piece of Protective Paper on top of the design, and underneath the Zip Case. The sandwich is: Protective Paper-Design (face down)-Substrate (Zip Case in this instance)-Protective Paper. Now we can sublimate! Use a Heat Press set to 400 degrees for 45 seconds. Be sure to keep the zipper out of the heat press so it doesn’t squish the zipper. You can also use a regular iron, set to the highest dry setting, pressing firmly for approximately 2 minutes in each area.
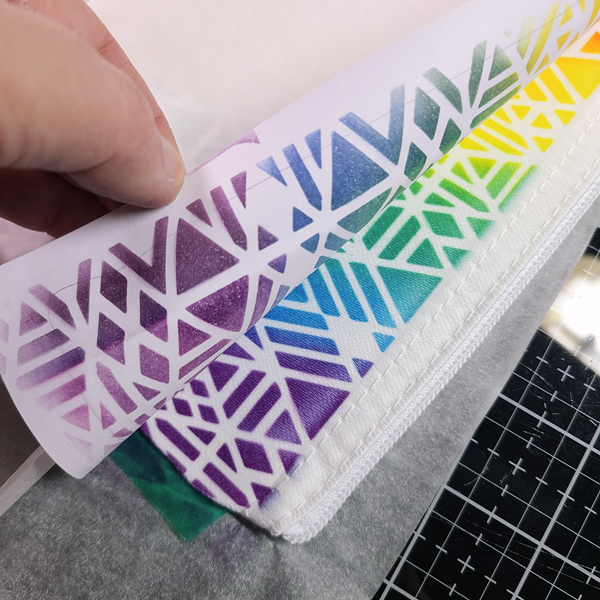
Here’s my Peek Test! You’ll want to make sure that your design sublimated on to your Blank properly, so pull back a small part of the design to check. If you need to re-sublimate, you can place the design back down where it was, since you should have used plenty of Heat Tape to keep it in place.
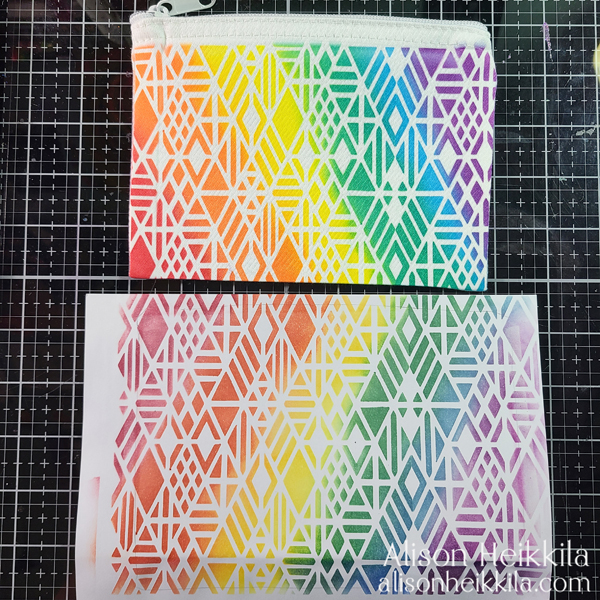
Here is what my original design looks like next to the completed Zip Case. See how much more vibrant the finished case is? Especially the green and blue.
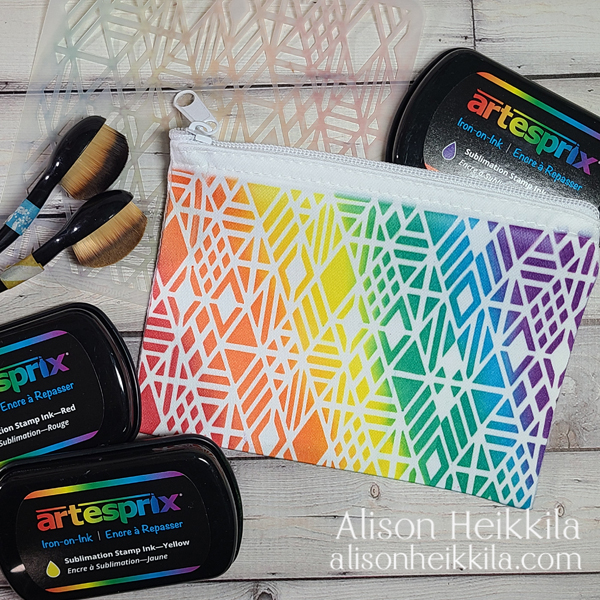
This is such a fun project, and I love that it’s simple and quick to make. Which stencils would you use on the Zip Case? A Colorful Life Designs has a ton of incredible options! And Artesprix is continuing to come out with new and exciting products. *Use code ALISON10 to save 10% at Artesprix and AlFan10 to save 10% at A Colorful Life Designs. Thanks so much for stopping by. Have an inspiring day!

Leave a Reply