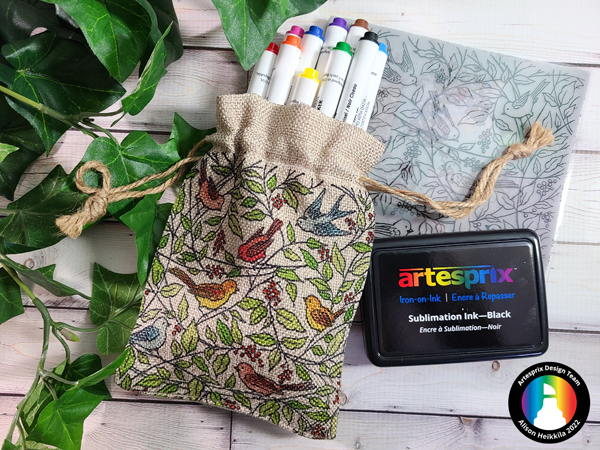
Hello! This is Alison Heikkila and today I have a new Artesprix sublimation project using the Drawstring Bag. I will admit, at first I was a little worried that the colors wouldn’t be vibrant because the Drawstring Bag is a natural brown color, but I was pleasantly surprised with the results! The colors are vibrant and beautiful. This bag would be great for wrapping small gifts in, which is what I plan to do with it.
*Affiliate links are used in this post. That means that if you shop through these links, I may receive a small compensation, at no cost to you.
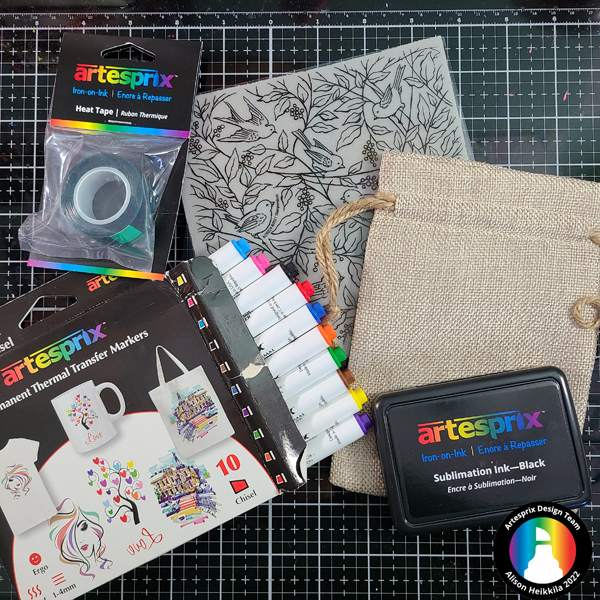
Materials:
Drawstring Bag
Sublimation Stamp Pad-Black
Original Sublimation Markers
Protective Paper
Heat Tape
Heat Source: Home Iron or Artesprix Heat Press.
Stampendous: Birds & Berries Cling Stamp
Stamping Positioner/Platform or Acrylic Block
Pencil
Watercolor Paper
Paint Brush
Glass Mat
Water
What are Sublimation Markers?
Artesprix Sublimation Markers and Ink are specially formulated inks that allow you to use basic copy paper to: color, stamp, and stencil anything you wish and turn it into a heat-transferable design. These designs are then applied to a polyester or polyester coated substrate with heat and pressure. You can use a heat press or a home iron! These designs, through this process of sublimation, will become permanent on your substrates.
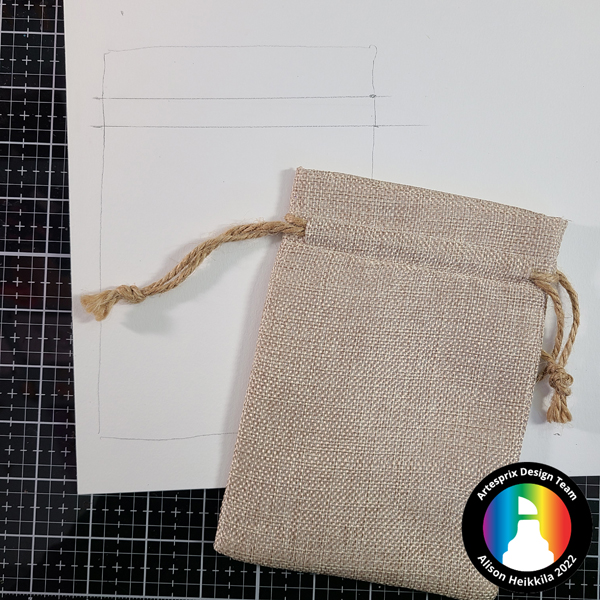
Step 1: Trace the outline of your blank on to a piece of watercolor paper with a pencil. The pencil will not transfer during the sublimation process. Normally, I would suggest just using copy paper, but since we will be applying our color like watercolor, it’s better to have paper that can accept the moisture. I indicated where the stitching was for the drawstring so that I would keep my stamped image below those lines.

Step 2: Stamp your images on to copy paper using the Sublimation Stamp Pad and a stamp positioner or an acrylic block. Because watercolor paper has a texture, it’s a good idea to re-stamp your image several times to get a dark, crisp image. I used a large, 6×6 stamp so that it would cover the bag easily.
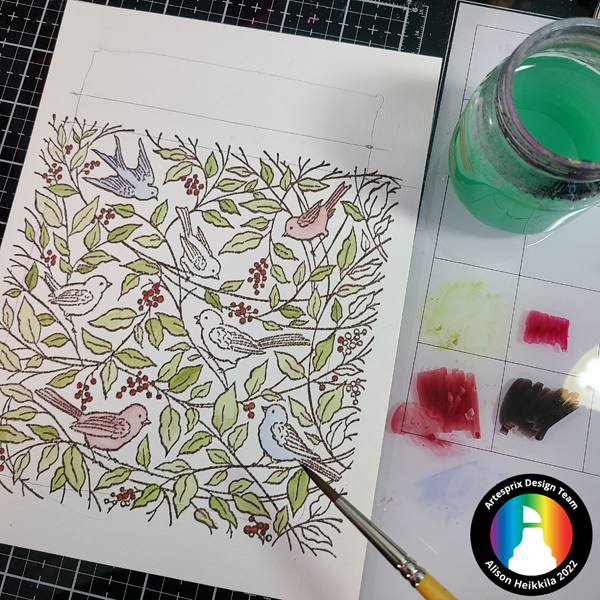
Step 3: Let’s paint! Scribble your chosen colors on to your glass mat or palette. You can paint and mix colors just like you would with watercolors. I started off with my leaves, using only the green marker. By using more and less water, you can greatly change the value of the green on the foliage, which is what I wanted.
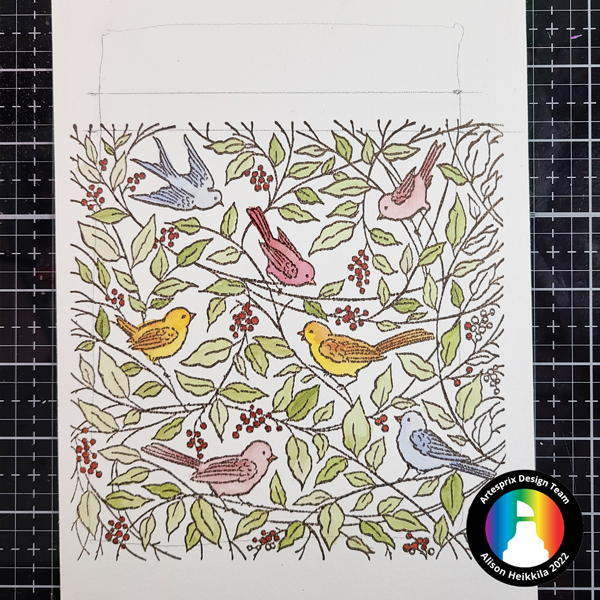
I painted my birds in a variety of colors, making sure to blend colors together. The berries were all done with the orange marker, directly to the paper. Don’t forget to warm up your heat press! I recommend doing it now, while you’re painting.

Step 4: Using Heat Resistant Tape, attach your drawstring bag facedown on to your colored image. You can line up your design easily by using your pencil lines as a guide. This bag is double sided, so technically there is no “wrong” side. If you are using a Heat Press, you don’t need much tape, but if you are using a home iron, be sure to use Heat Tape around the entire blank to ensure that it doesn’t move during the sublimation process.
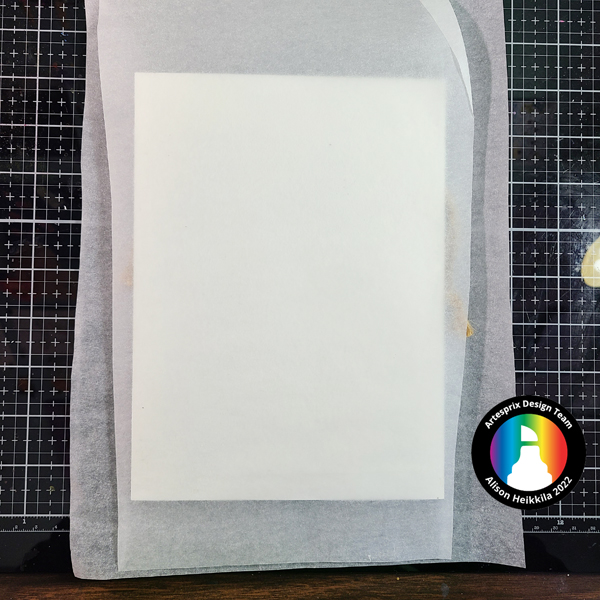
Step 5: It’s time to make our Sublimation Sandwich. The photo above may not look like much, but it is extremely important whether you are using a home iron or a Heat Press. Cut one piece of protective paper that is bigger than your drawstring bag. Cut a second piece of protective paper that will fit inside the bag. Because this bag can be sublimated on both sides, we don’t want to take a chance that our image will transfer through the bag, so by putting the paper inside the bag, it will ensure that the image will only transfer to one side. Your sandwich when you are sublimating will be drawstring bag -protective paper inside the bag – colored image – protective paper.

Step 6: Press the Drawstring Bag for 45 seconds at 400 degrees.
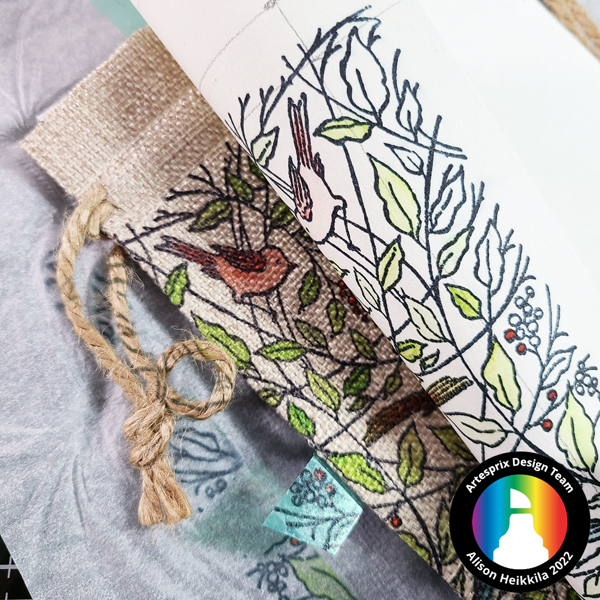
Step 7: It’s time for the peek test! This is a very important (and exciting!) step. Very carefully peel back part of the paper to see how your image has transferred. Be sure to not remove too much, in case you need to press the item again. Look at how vibrant those colors are, even with the natural brown color of the bag!

How gorgeous is this?! Look at the variation of colors in the leaves and the birds. They look so good.
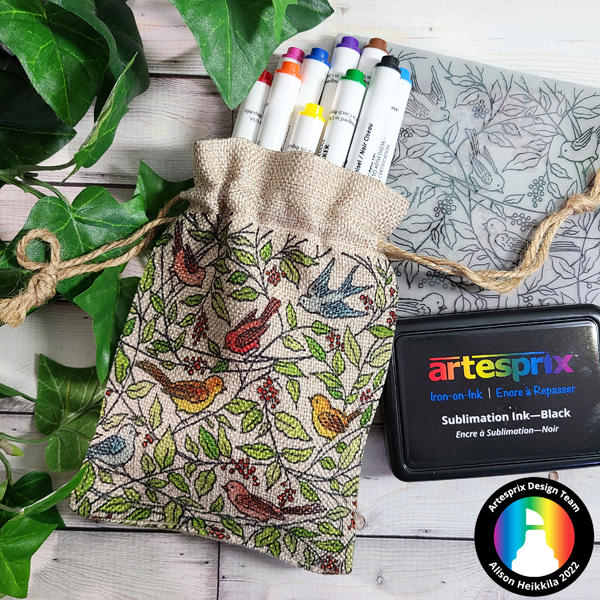
I really love this little Drawstring Bag, and I can’t wait to make more of them. By using on 6×6 stamp, I was able to cover the entire bag quickly, and painting with the markers is so much fun. This little bag is perfect for wrapping gifts, and it’s so good for the environment because it’s reusable. How would you like to get more ideas on how to use Sublimation Markers? There’s a Facebook Group that’s just for fans of Artesprix! You can click HERE to join. Also, don’t forget to visit the Artesprix store to see all of the available blanks and bundles, so you can get started with sublimation. Thanks so much for stopping by. Have an inspiring day!
[…] excited to work with this same material again. If you’d like to see that project, please click HERE. I decided for the Wine Bag, I would use minimal supplies, as not everyone has stamps or […]