
Hello! This is the time of year that people get really into making tags. Tags for gifts, tag books, etc. Today I’ve got a fun way to use Memento Inks to make them look like you’ve watercolored, but you didn’t need to work as hard. We will be using a layering stamp set to create the focal point of the tag. I used Poinsettia Parts from Stampendous.
Skill Level: Beginner
Time to Complete: 10 Minutes, plus drying time between layers
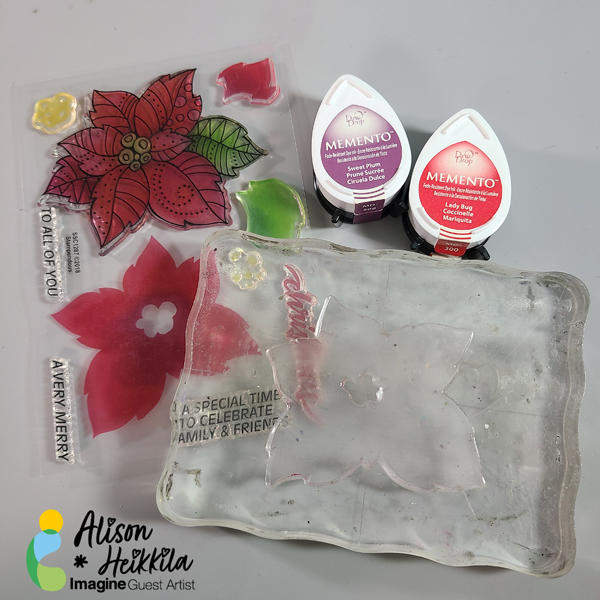
Step 1: Using an acrylic block or stamp positioner, adhere your most solid layer.
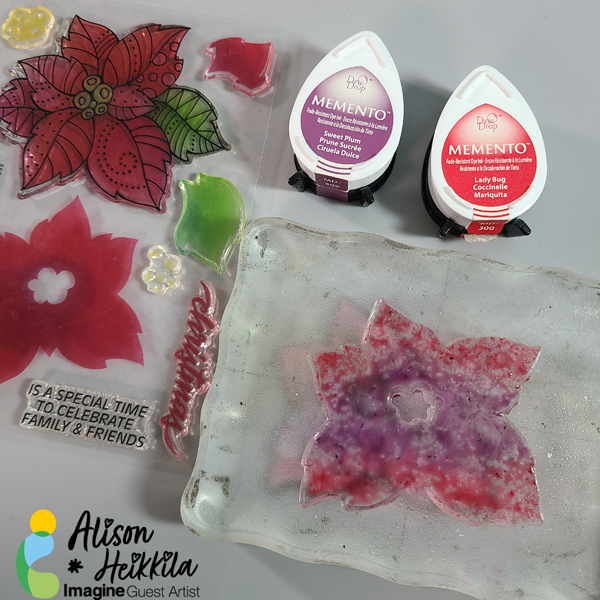
Step 2. Ink up the stamp with at least 2 colors of Memento Ink. I used Sweet Plum and Lady Bug.
Step 3. Spritz the inked stamp with water. Let the colors start to run together, but don’t spritz the stamp so much that the colors become totally washed out.
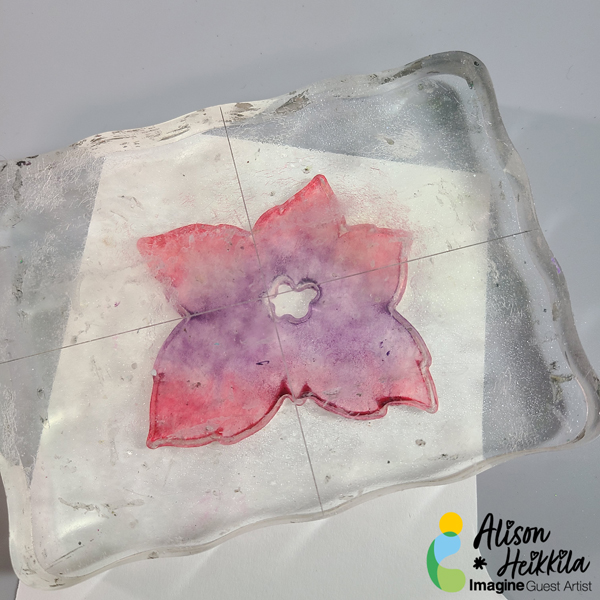
Step 4. Carefully flip your stamp over on to a piece of watercolor paper. Gently press the stamp into the paper and leave it there for a few minutes. You can even add something heavy on top if you want more consistent pressure.
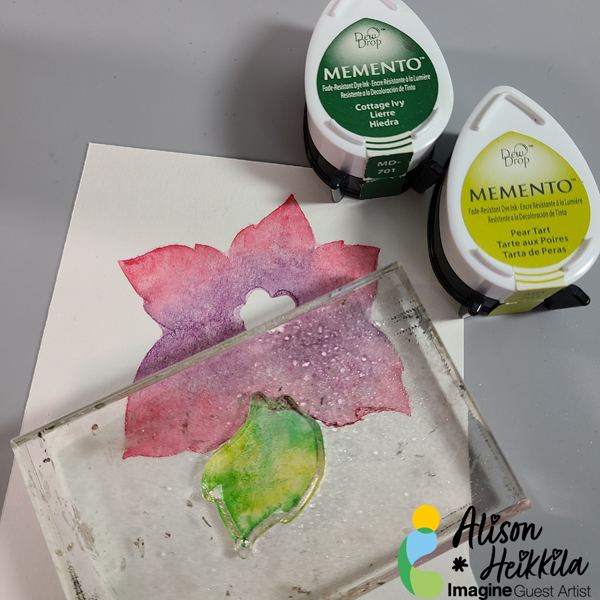
Step 5. Repeat Step 4 with any additional parts of your image. I needed to add a leaf and another petal. I used Pear Tart and Cottage Ivy for the leaf. Let all of the “watercolor” layers dry thoroughly before moving on.
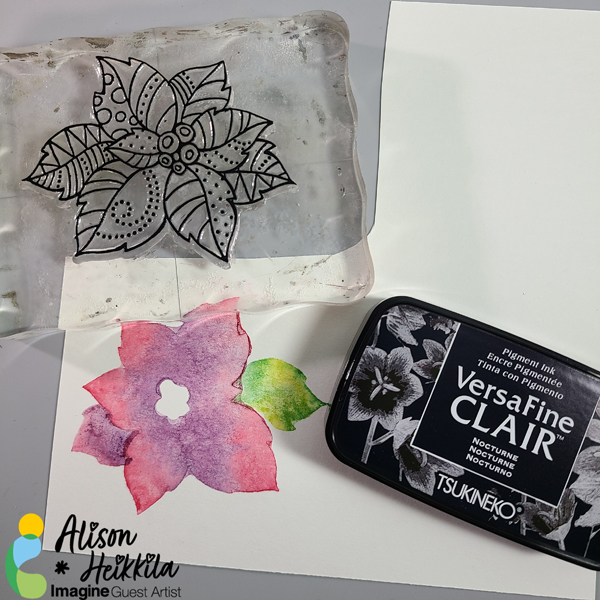
Step 6. Stamp the top or detail layer with VersaFine Clair ink in Nocturne.
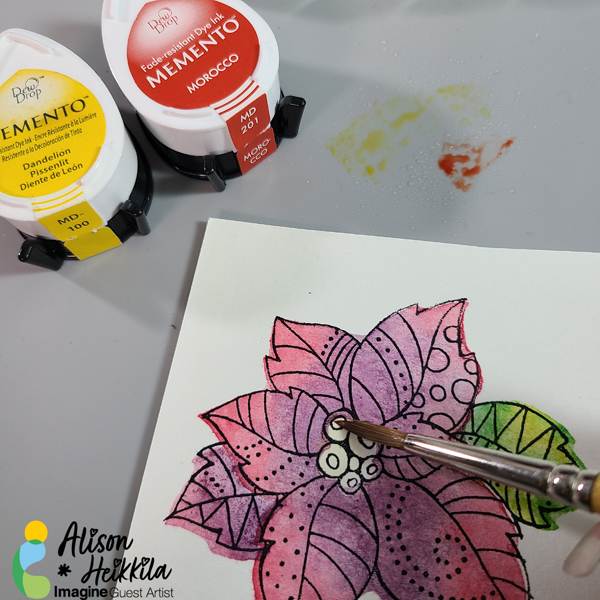
Step 7. To add additional detail, you can apply some ink to your Craft Mat and spritz with water, then apply with a paintbrush. Here, I used Dandelion and Morocco to color in the center of the poinsettia. Fussy cut the stamped image.
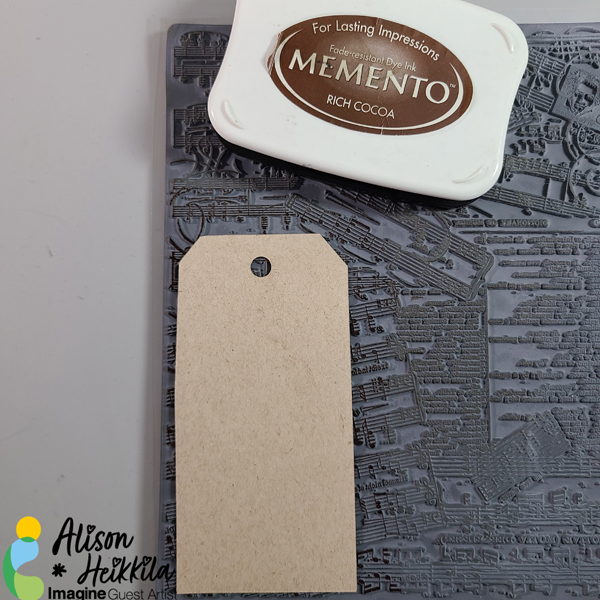
Step 8. Apply Rich Cocoa Memento Ink to a background stamp. I used an older Stampendous stamp with sheet music on it. I like to flip my stamp up and apply my substrate (in this case, a tag made with Kraft cardstock) on top of the stamp. I press the tag into the stamp with my fingers. This allows me to place the tag where I want, and I don’t need to fuss with a large, sometimes unwieldy large stamp. You may also do this step while allowing your poinsettia to dry.

Step 9. Ink up a blending brush with more Rich Cocoa ink and gently buff the edges. You may smear some of your stamped image if it hasn’t dried completely, but I don’t mind that look. It helps to make the tag look old.

Step 10. Add a sentiment strip to your tag, adhere the poinsettia, and tie on some ribbon.
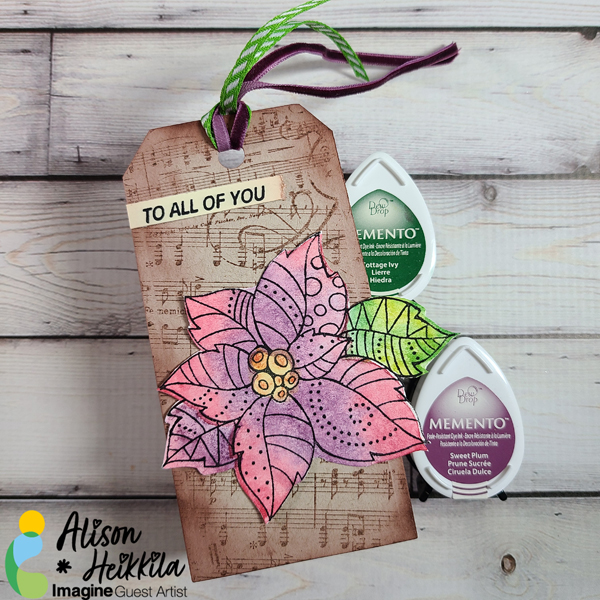
Now you’ve got a completed tag that you can add to gifts, use it as a place card at the dinner table, or even to decorate a card base. Experiment with different color palettes to get a wide range of looks. And remember, these techniques don’t have to be used only at holiday time! Thanks so much for stopping by. Have an inspiring day!
Supplies:
Imagine:
Memento Inks in Lady Bug, Sweet Plum, Dandelion, Morocco, Cottage Ivy, Pear Tart, and Rich Cocoa
VersaFine Clair Ink in Nocturne
Tear It! Tape
Craft Mat
Other:
Stampendous: Poinsettia Parts and sheet music Cling Stamp
Kraft Colored Tag
Ribbon
Blending Brush

Leave a Reply