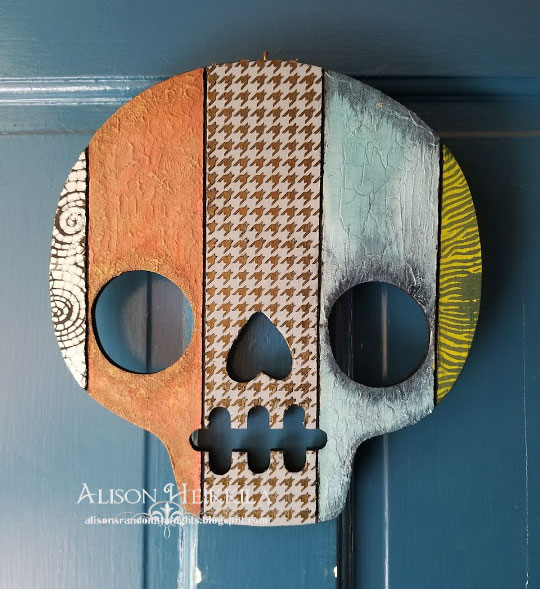
Happy Friday the 13th! Today is Day 13 of the 31 Days of Halloween. Today I’ve got something completely different from what I’ve been sharing so far. It also took quite some time to complete, though I had so much fun doing it. My family and I went to Target and found this $3 unfinished skull. I had to have it because of all the possibilities it presented. Because the skull is made up of slats, I decided to go with a few of my ideas all on the one piece. I am adding this to the Simon Says Stamp Monday Challenge, which is Anything but a Card. Take a look.
This guy is about 12″ x 12.” I treated each panel with a different technique using various DecoArt Media, Stampendous, and Imagine products. Let’s break each panel down individually.
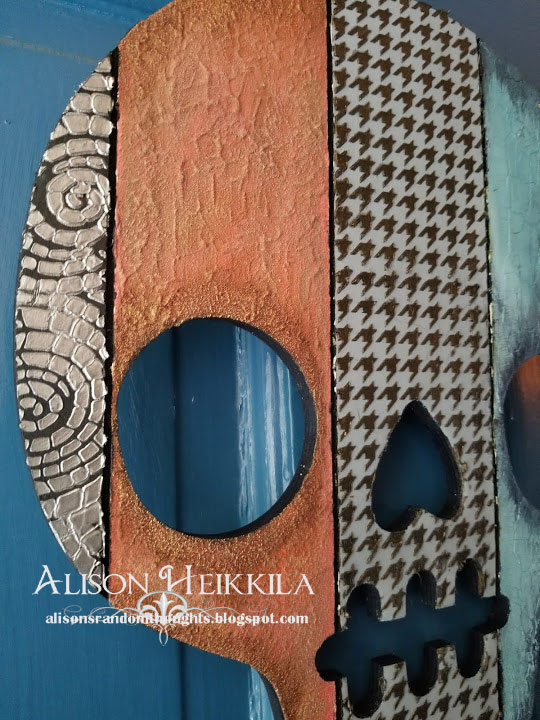
The panel all the way to the left was created by first giving the wood a coating of Carbon Black Fluid Acrylic from DecoArt Media. Then I used Silver Creative Medium from Imagine, along with the Mosaic Swirls Stencil from Stampendous.
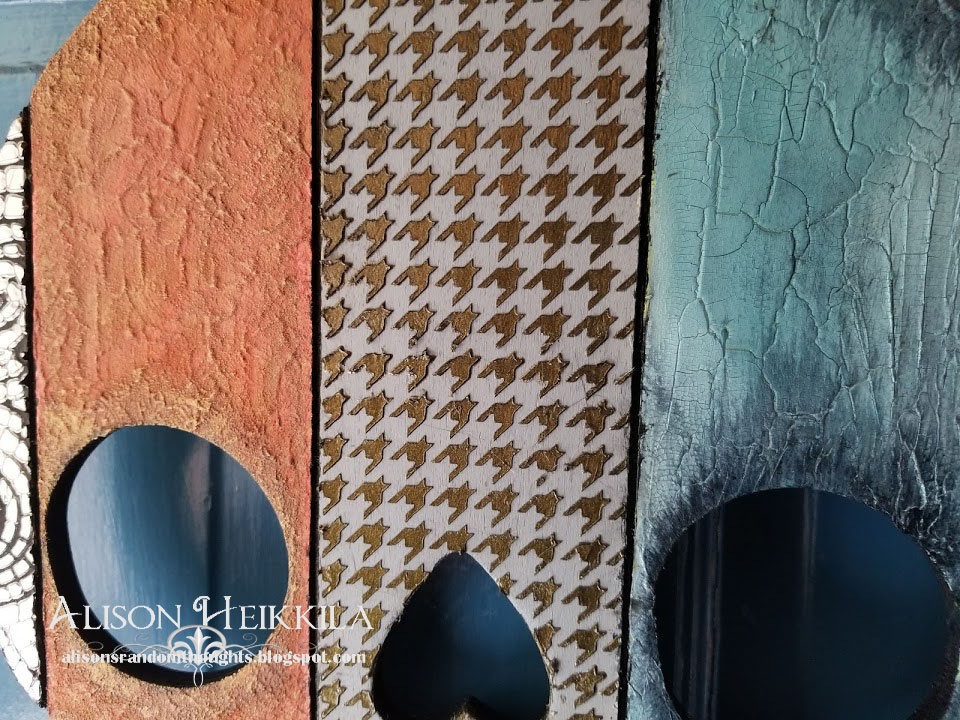
The next panel was more involved. I blended 3 drops of Cadmium Red Hue with 4 drops of Burnt Umber with Texture Paste. I applied the mixture with a stiff brush and stippled it on. Quinacridone Gold was applied in random areas, along with Iced Espresso Metallic Lustre. After that dried, I rubbed on some Interference Gold with my finger to give a hint of gold to the raised portions. I also thinned out some Burnt Umber and applied it around the eye and outer edges.
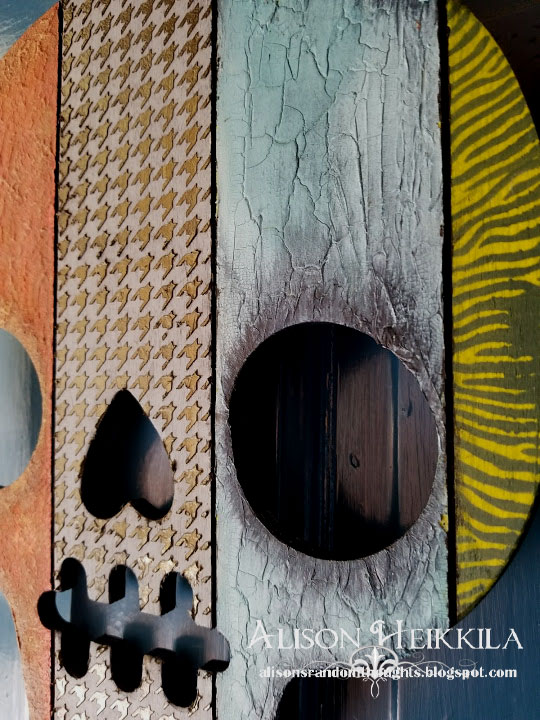
The center panel was first painted with a mixture of 2 drops of Paynes Gray and 1 drop of Titan Buff. This gave a nice, smooth soft gray. After that, using the Houndstooth Stencil (a true favorite of mine), I applied a layer of Metallic Bronze Creative Medium. I needed to do this in a few steps, since of course the stencil doesn’t fit down the entire length of the skull.
The panel to the right of the center has a lot of blue tones. I first applied a layer of Green Gold Fluid Acrylic, and then made a mixture of Crackle Paste with Cobalt Turquoise Hue and Paynes Gray. My cracks didn’t really go down to the first layer of green, so you don’t see it except in a few small areas. I added shadows around the eye and outer edge of the skull (as I did with the other side) with Prussian Blue Hue and Paynes Gray.
The final panel, all the way on the right, was first painted with a layer of Green Gold. Since you can’t see it in the panel to the left of it, I decided to use it again here. It’s a fabulous color! Then I stenciled on the Zebra Stripe Stencil (DWLJ901) with Forest Green VersaCraft ink and a stencil brush.
Keep in mind, this was done over the course of several days, and working on several panels at a time (that weren’t next to each other) to help keep the process moving. A lot of drying time was needed, so I would often work on this in the evening so that it had time to dry overnight. I am going to apply a layer of sealer, most likely a matte sealer from DecoArt. I just haven’t gotten to it yet. This was a blast to paint, and I really wish I had picked up the other 3 characters from Target that were available. Not sure if they are still there. But it was great to experiment with these colors and different mediums. Please be sure to visit the Wicked Bloggers, all listed below. Thanks for stopping by. Have a spooktacular day!
Lost Coast Designs/Carmen’s Veranda
Alison (that’s me!)

WOW! Love this!!
Love your altered skull project!
Love this.
In the past I'd have shown this
to my husband and he'd have made
one for me. He loved to work
with wood. Now I just dream
of the things I'd like to have.
thanks for sharing
Spooktacular, love the effect of each technique!
Each panel is Awesome!
Love the different textures you created! Awesome project!
This is cool! Love the way you made the skull and the different material used. Thank you for joining Simon Says Stamp Monday Challenge.
This is incredibly awesome, Alison. Love the different media you used and how great it looks!! Thanks so much for sharing this project!