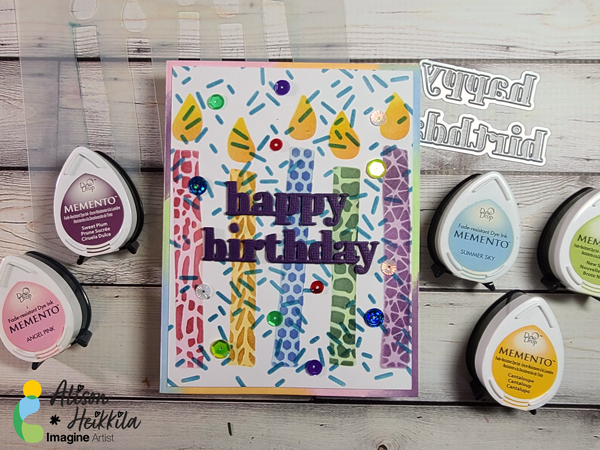
Hello! Since birthdays happen all year, it’s good to have a big stash of birthday cards at the ready for whenever you need one. Since I love to use stencils, I thought I would use a bunch of them together with many colors of Memento Inks from Imagine.
*Some affiliate links are used in this post. That means that if you shop through these links, I may receive a small compensation, at no cost to you. For more information, please see my Affiliates page, where I also have some coupon codes.
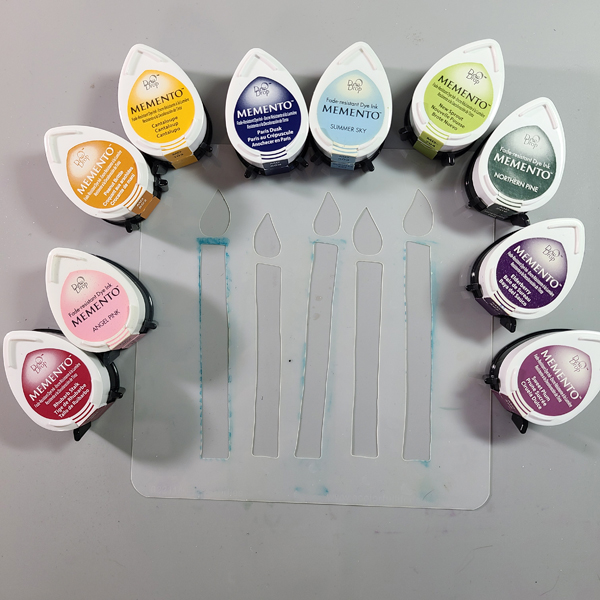
I chose a light color and a dark color Memento Ink for each candle of the Big Candle stencil.
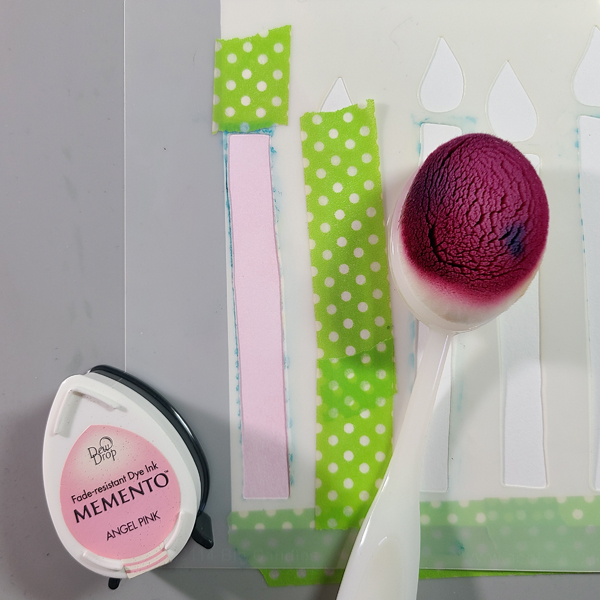
Step 1: Use washi or low tack tape to stick down your cardstock and stencil. Mask off any areas that you don’t want your first color of ink on. I masked off the second candle and the flames.
Step 2: Ink the candles with the lighter color from the pairs you chose. Be sure to mask off the areas that you don’t want your ink to go.
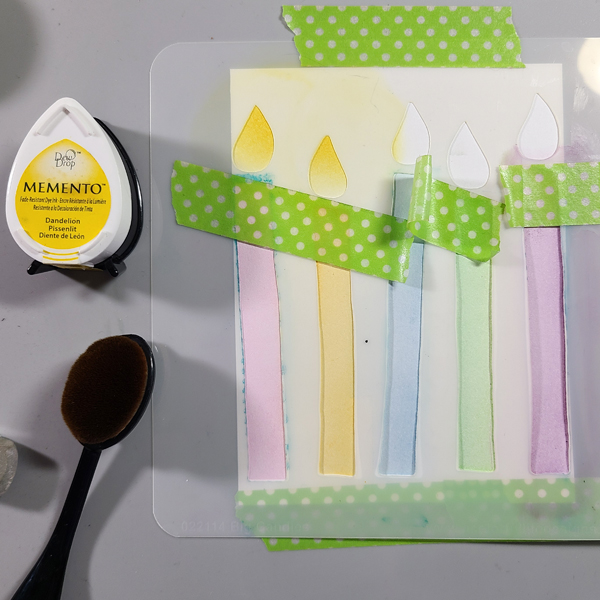
Step 3: Mask off the candles so that you can ink the flames. I used Dandelion on the entire flame, and then Tangelo on the lower area of the flame.
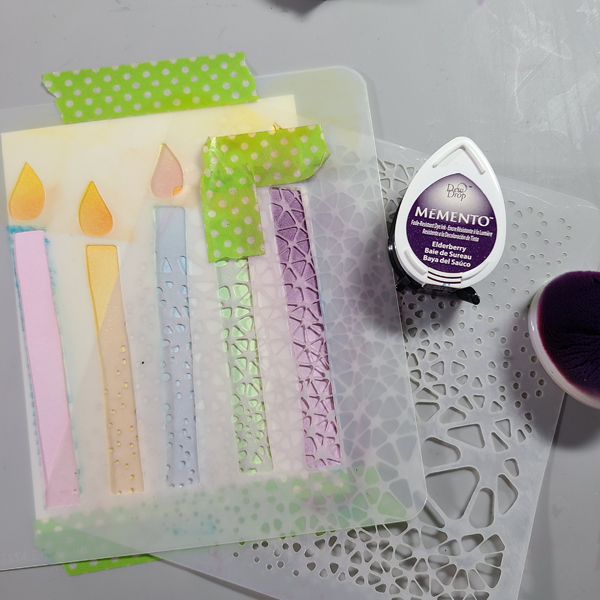
Step 4: Choose the stencils you want to decorate each candle with and ink with the darker shades you chose. You must keep the original candle stencil in place so that you only ink the candle. Slip the patterned stencil under the candle stencil to make inking easy. Be sure to mask off the other areas again!
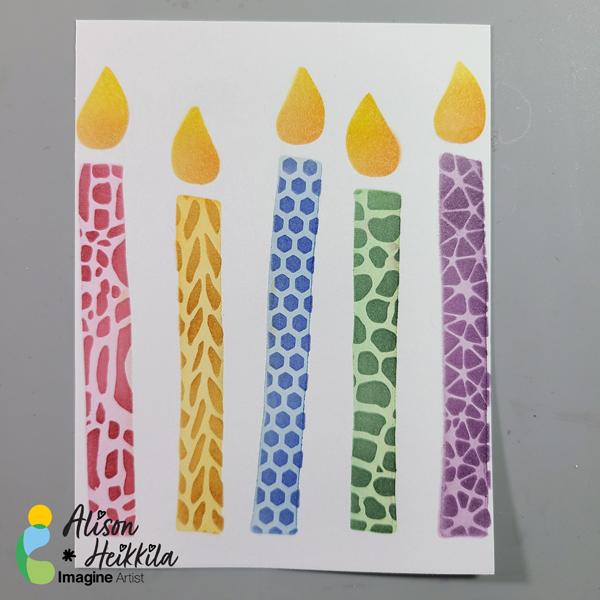
This is what the completed candles look like. You can stop here, if you want, but I kept going to make it even more festive!
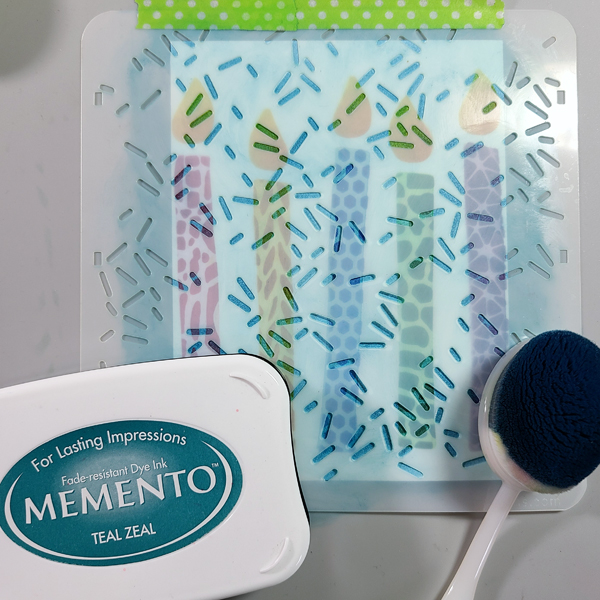
Step 5: Ink a stencil that looks like confetti or sprinkles on top of the entire panel.
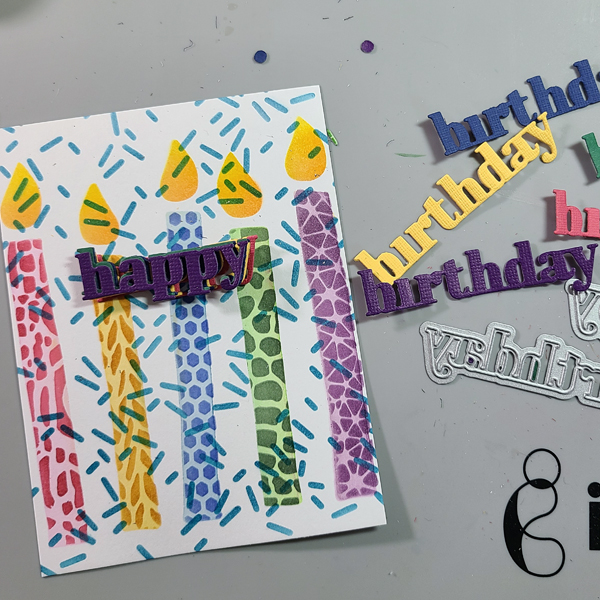
Step 6: Die cut your sentiment. First, I was only going to die cut my “happy birthday” out of purple, but I decided to cut one sentiment out of each main candle color so that I can have a stacked, 3D embellishment. You can glue these together with On Point Glue.
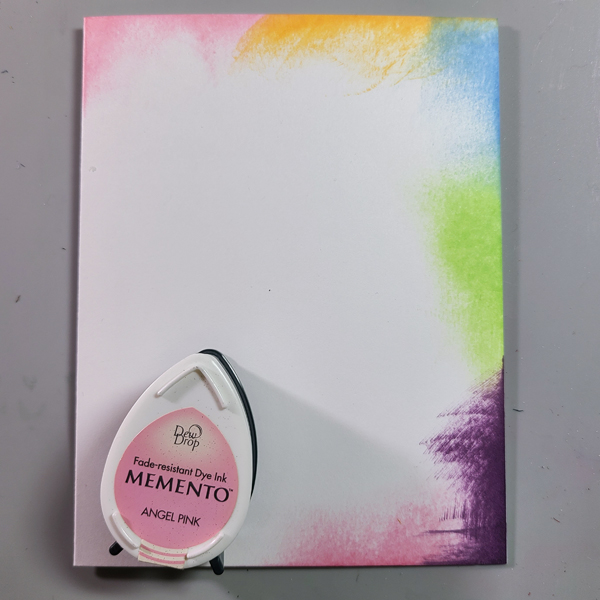
Step 7: Ink your card base using the lighter colors of Memento Ink, directly from the pad. I worked my way around my palette of colors two times.
Step 8: Glue the card front and sentiment on to the card base. Optional: Add sequins or rhinestones to the card front with On Point Glue.
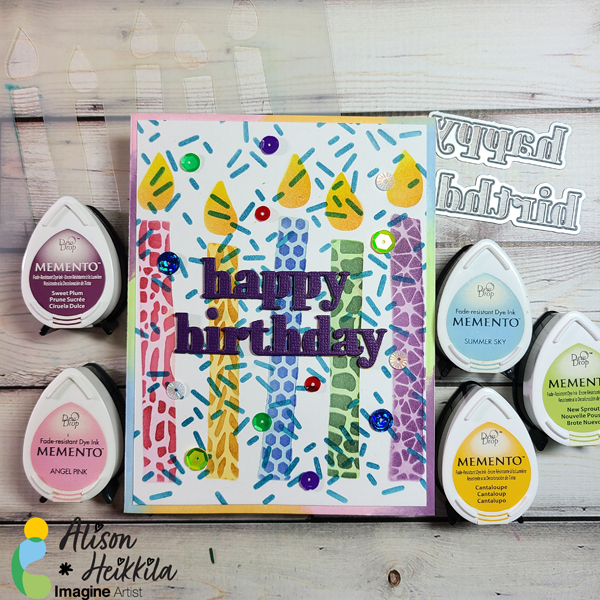
Here is the finished card! I love how happy it is, and it can easily work for anyone. It’s fun to work with so many colors and so many patterns of stencils, all on one project. I hope that you break out some of your stencils and try this technique! Thanks for stopping by. Have an inspiring day!
Supplies:
Imagine:
Memento Ink: Angel Pink, Rhubarb Stalk, Cantaloupe, Peanut Brittle, Summer Sky, Paris Dusk, New Sprout, Northern Pine, Sweet Plum, Elderberry, Dandelion, Tangelo, Teal Zeal
On Point Glue
Other:
A Colorful Life Designs: Big Candles, Milky Way, Cozy Knit, Primative Batik, Crocodile, Teeny Honeycomb, Layered Party 1
Simon Says Stamp: Happy Birthday Die
The Rabbit Hole Designs: Cotton Tail Blending Brushes
Sequins
Washi/Low Tack Tape
White Cardstock

Leave a Reply