Summer is in full swing, and I couldn’t be happier. I love the heat, and my family and I like to visit the beach. I love on Long Island, so the beach is always pretty close by no matter where we are. There’s something so magical about the beach at night, so I thought it might be fun to make a nighttime beachy card.
Supplies:
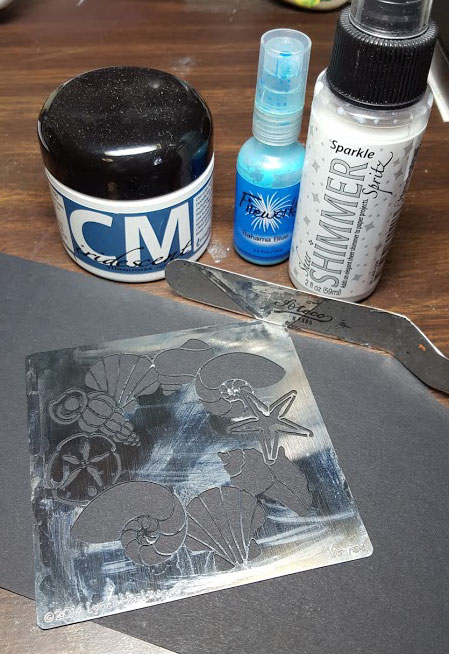
Imagine Crafts: Turquoise Creative Medium, Bahama Blue Fireworks!, Sparkle Sheer Shimmer, Wedding Dress irRESISTables, Brillance– Pearlescent Sky Blue, Encore Metallic– Blue, VersaMark ink pad
Other:
Stampendous: Shell Wreath Stencil, Ocean Wisdom Perfectly Clear Stamps, Ice Blue Embossing Enamel, Palette Knife, Paste Spreader
Black Cardstock
White Card Base
Adhesive
Embossing Gun
Directions:
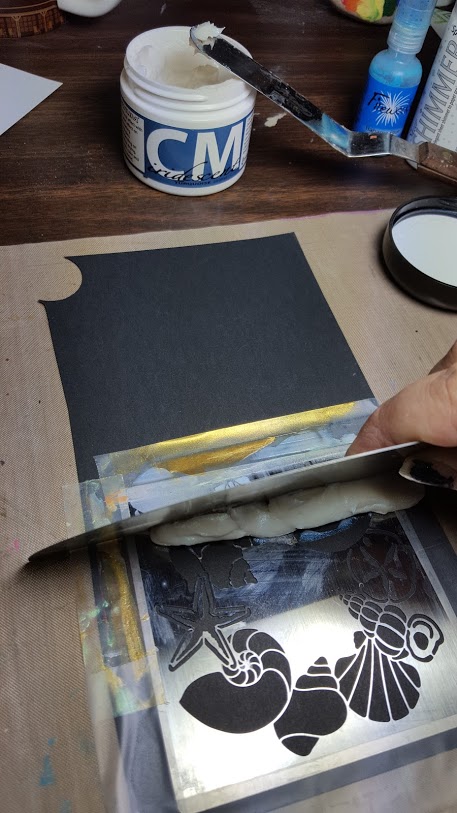
1. Tape the Shell Wreath Stencil to black cardstock. Glob (that’s a technical term) some Turquoise Creative Medium at the top of the stencil. Take the Paste Spreader, hold it at a 45 degree angle, and slowly drag the paste across the stencil. Try to touch it up as little as possible. You can run the Paste Spreader down across the stencil again, but if you work the paste too much, it doesn’t look as smooth. Let the paste dry.
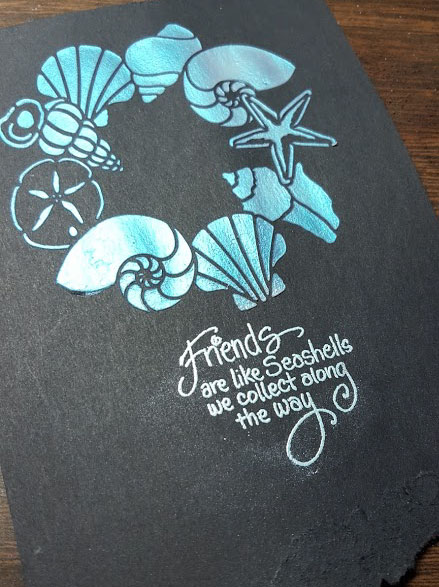
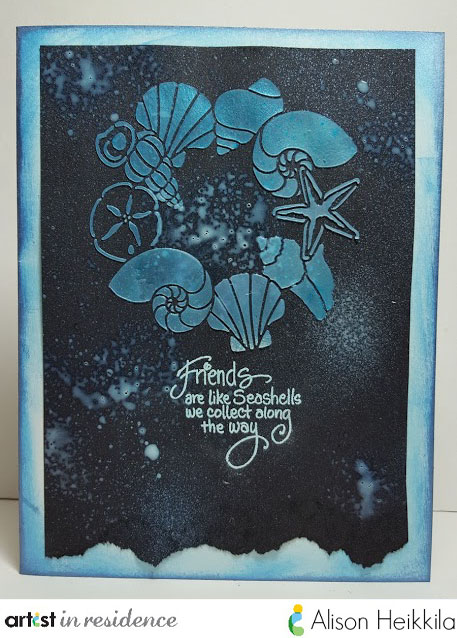
2. You can see how beautifully the iridescent quality of the Creative Medium shows up on the black cardstock. I chose a sentiment from the Ocean Wonders set and stamped it with VersaMark ink. Then, it was heat embossed with Ice Blue embossing enamel. Tear the bottom edge of the black cardstock for some added texture.
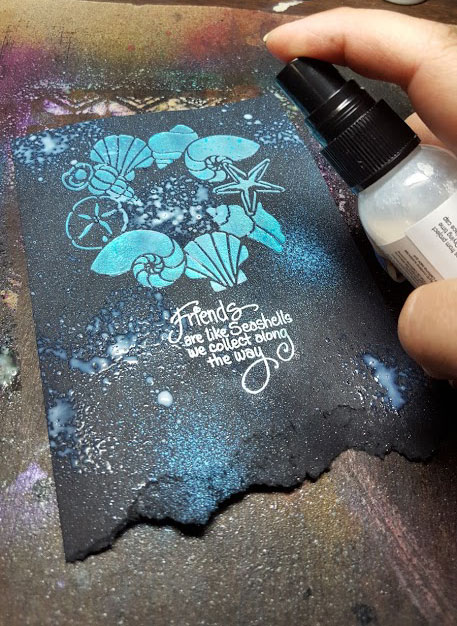
3. Using the sprays listed above, start spritzing them all over the black cardstock. I sprayed fairly close to my project to get more concentrated areas of color. No need to wait for the sprays to dry between colors…I like the look of them swirling together. When you’re happy with the overall look, set the piece aside to dry completely.
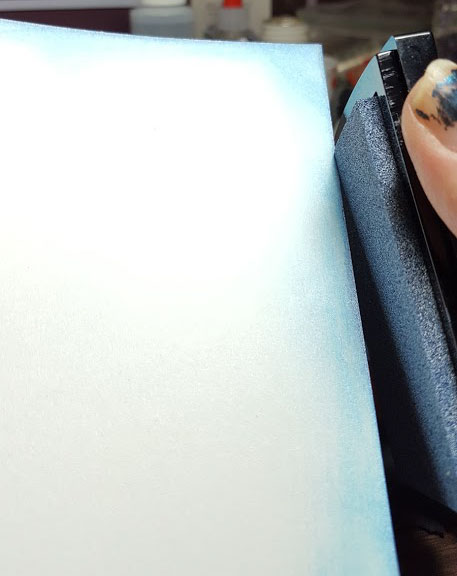
4. Ink up the edges of the card base. I went with Pearlescent Sky Blue from the Brilliance collection first and I went in about 1/4″ all the way around. Then I used the darker Encore Metallic Blue around the edges, but I kept the line really narrow. Next, glue the black cardstock to the base of the card.
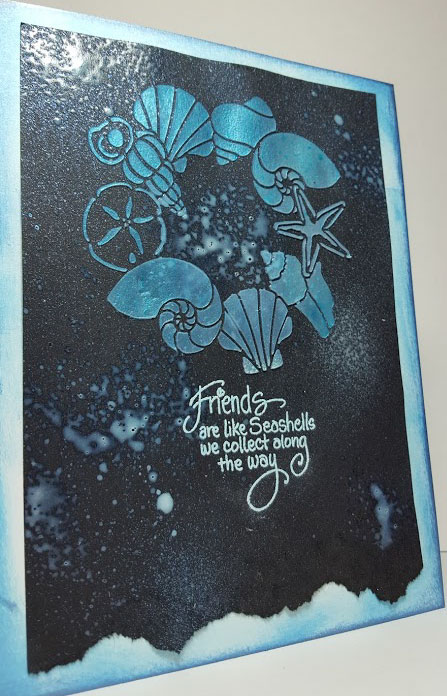
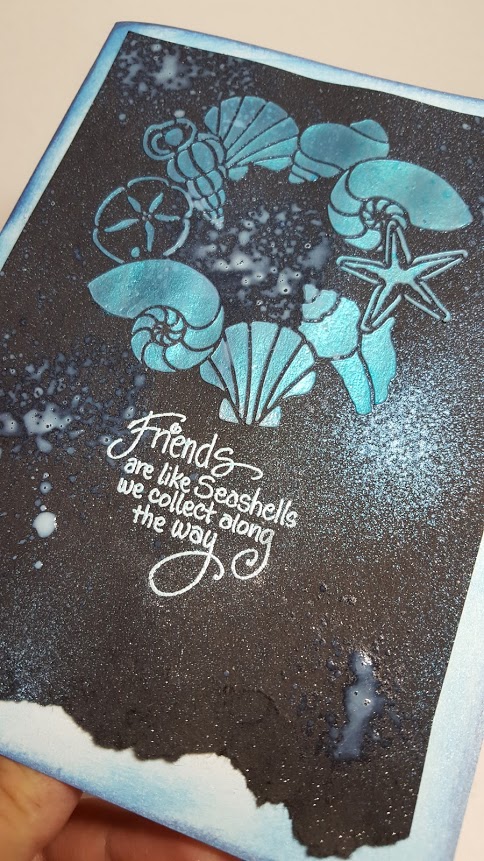
Ta-da! The finished card, in all it’s shimmering glory. Here’s a close-up of the sprays….
Thanks for checking out my card!
Time to Create: 25 minutes, plus drying time.
Level: Beginner to Intermediate
Thank you so much for your kind words!